What can you replace the hard drive with? How to change the hard drive on a computer or laptop without losing data, without uninstalling Windows? Step-by-step instruction. What to do with an old HDD
When the hard drive is outdated, begins to perform poorly, or the current capacity becomes insufficient, the user decides to change it to a new HDD or SSD. Replacing an old drive with a new one is a simple procedure that can be performed even by an untrained user. This is equally easy to do on a regular desktop computer or on a laptop.
If you decide to replace the old hard drive with a new one, then it is not at all necessary to install a blank disk, re-install the operating system there and download the remaining files. It is possible to transfer the OS to another HDD or SSD.
You can also clone an entire disk.
Replacing the hard drive in the system unit
To first transfer the system or the entire disk to a new one, you do not need to take out the old hard drive. It is enough to complete steps 1-3, connect the second HDD in the same way as the first one is connected (the motherboard and power supply each have 2-4 ports for connecting drives), boot the PC as usual and transfer the OS. You can find links to migration guides at the beginning of this article.

Replacing a hard drive in a laptop
Connecting a second hard drive to a laptop is problematic (for example, for preliminary cloning of the OS or the entire disk). To do this, you will need to use a SATA-to-USB adapter, and connect the hard drive itself as an external one. After transferring the system, you can replace the disk from the old one to the new one.
Clarification: To replace the drive in your laptop, you may need to remove the bottom cover of the device completely. Exact instructions for disassembling your laptop model can be found on the Internet. Select small screwdrivers that fit the small screws that hold the laptop lid in place.
However, there is no need to remove the cover very often, since the hard drive can be located in a separate compartment. In this case, you will need to remove the screws only in the place where the HDD is located.

Now you know how easy it is to replace a hard drive in a computer. It is enough to be careful in your actions and follow the instructions for proper replacement. Even if you didn't succeed in replacing the drive the first time, don't get discouraged and try to analyze each step you completed. After connecting a blank disk, you will need a bootable USB flash drive with an operating system to install Windows (or another OS) and use your computer/laptop.
Do you want to replace the hard drive on your laptop? Then you have come to the right place. This weekend didn't work out as I thought it would. I was going to work hard on some applications. And some other work, but my computer is broken. And I got a blue screen - repair fix - reboot loop. There was nothing I could do, I tried everything. Anyway, I finished transferring my data using Linux to memory on boot, but after 12 hours the data transfers were very slow (2MB/s). I noticed that not all the data was there and I didn't have time to wait and repeat. Reset what to do if you forgot your laptop password.
I ran to the local computer store and was going to buy a SATA to USB. But instead I got a pocket for an SSD (that's the drive I have). Which I intend to use with an SSD drive. Which I ordered from Amazon (Samsung is cheaper now since they just released an updated version and they sell the old ones cheap). As an additional portable storage device for temporary backup. I also have screwdrivers, tiny ones and T5 ones, etc.. Because I need them for some other devices. Lenovo introduced the world's first.
The hard drive is likely to malfunction if it is reset or put under a lot of stress. If your computer won't boot and has hard drive/ssd read errors, follow this guide to replace it. You will need screwdrivers. Reset to factory settings (Hard reset).
Replacing a Laptop Hard Drive: Step 1 Battery

Step 2
Find the two switches that block the battery. Press the right switch to the "unlocked" position. (On another model it may be in a different place, or everything may be different).

Step 3
Press and hold the left switch outward in the unlocked position, then carefully slide the battery away from the computer.
 (Replacing the hard drive on a laptop)
 Replacing the Hard Drive on a Laptop: Step 4 Rear Panel
I placed the laptop upside down, turned off the AC, on a clean table and unscrewed the top screws marked in this picture. I then used a flathead screwdriver to carefully pry the cover out from the top (where the screws are). Because the lid is a hinge and you don't want to replicate the plastic hinges on the bottom.

Step 5

Step 6
The computer must be opened showing many internal components. You can now access your hard drive, RAM, and keyboard.
 (Replacing the hard drive on a laptop)
 Replacing the hard drive on a laptop: Step 7 Hard drive
The drive, a silver square, is held in place by one small screw that holds the mounted housing in place. Unscrew it, and if you don't have tweezers and a steady hand, just turn the laptop over. When your handle closes the open section to get the screw.

Step 8

Step 9
Remove the four #1 Phillips 5.2mm or larger screws (depending on your laptop model). There are two devices on each side of the drive that hold it in the bay.
 (Replacing the hard drive on a laptop)
 Step 10
Pull the drive out of the compartment. If all the screws have been removed correctly, it should just slide out. If this article helped you, share it with your friends. our group
If your new Windows 10 PC takes a long time to boot, it's most likely because it's running on a regular hard drive. This also applies to most older computers. Did you know that replacing your hard drive with a solid state drive (SSD) will make your machine run much faster? It's true, a five-year-old computer with an SSD is much faster than even a brand new one running on a regular hard drive. The good news is that replacement drives are fairly easy to make, and not too expensive, thanks to the fact that SSD drives are now much more affordable than they were just a few years ago.
(A standard SSD looks like a traditional 2.5-inch laptop hard drive, but it's much faster.)
In this article, I'll show you how to replace your Windows computer's internal hard drive with an SSD while keeping your software, data, and settings intact. The computer must be running Windows 7, 8, or 10. Previous versions of Windows do not support SSDs well - drives. The steps in this article were performed on Windows 10, which you can install, by the way, as a free update until July 29, 2016, MacBook owners can familiarize themselves with.
General direction. The replacement process basically involves cloning the contents of the existing hard drive to SSD, and then directly replacing the hard drive from the computer to SSD. This is a similar process for desktop and laptop computers, although it is much easier to work with a desktop computer due to its larger size.
Depending on how much data you have on your computer's main hard drive, this project will take anywhere from 20 minutes to several hours. You won't need to be actively involved for most of this time.
A. Preparation.
There are a few things you need to consider for this job.First, you obviously need an SSD. While not all SSDs are created equal, all SSDs are much faster than any regular hard drive, so the differences between them are negligible to someone replacing a regular hard drive. However, with a drive, try to buy the most capacious drive for the least money.
One important thing to keep in mind is to make sure you buy an SSD with a higher capacity than the total amount of data you currently have on the hard drive you are replacing. This means, for example, that if your computer's main hard drive has a capacity of 1TB, but you've used about 200GB of it, then you just need an SSD with a capacity of about 240GB. You can buy a larger SSD or the same capacity as your existing hard drive if you can afford it.
The second thing you need is cloning software. There are quite a few out there, and most of them work well (some SSDs come bundled with this kind of software), but my favorite is the free version of Macrium Reflect. This software allows you to clone an existing drive to a new one without even restarting your computer. It also supports all types of hard drive formats.
The third thing you need is a USB-to-SATA adapter. These adapters can be found online for around $15 or so. If you have an external hard drive (whether portable or desktop), you can use the adapter part to get the job done. Note that for a desktop computer, as an option, you can skip the search for such an adapter and install the SSD as a secondary internal drive for the cloning process, which is much faster than via a USB connection.
Lastly, you will need a small screwdriver. Choose the one that fits the screws on your computer. Typically, a standard small Phillips will do.
Additional preparation.
This step is only necessary if you want to use an old used SSD (one that was formatted before) to replace the existing hard drive on your computer. If you bought a new SSD, you can skip this step and go directly to the cloning process.There are two types of disc formats. These are the Master Boot Record (MBR), which is used in Windows 7 and earlier, and the GUID Partition Table (GPT), which was adopted on Windows 8 and later. (Note that Windows 8 and Windows 10 work with MBR too.) If you want to use a used SSD for your computer, you will need to first convert it to the same disk format as your existing hard drive for the process cloning. If not, the system may not boot as a result.
It's pretty easy to figure out whether your computer's existing hard drive is using GPT or MBR. Here's how to do it.
1. Launch Command Prompt. (Right click on the "Start" button and select "Command Prompt" or search in the menu "All Programs>Windows System Tools").
diskpart then press Enter. (Answer yes to the User Account Control question if prompted.)
3. At the diskpart command prompt, enter list disk, then press Enter.

You will see a list of disks installed on the system. If a drive is listed with an asterisk (*) in the GPT column, then it uses GPT. Otherwise, it is an MBR drive.
And here's how to make sure the SSD has the same format type:
1. Launch Command Prompt.
2. In the Command Prompt window, enter diskmgmt then press Enter. This will open the Disk Management window.
3. In the disk management window, find the SSD, which will be shown as disk 1 (or disk 2, etc. depending on the number of disks you have on the machine). Right-click on the SSD then select "Convert to GPT" (if the current drive is using MBR), or "Convert to MBR" (if the current one is using GPT.) Just make sure it's the same type of disk format as the existing hard drive .

B. Disk cloning.
Now that you have everything you need, let's begin the process. Insert the SSD into your computer's USB port using a USB-to-SATA cable.(Please note that the steps below are done on Macrium Reflect. With other versions or other cloning programs, the steps will be slightly different, so follow the software's instructions, but it should be fairly easy to understand. The idea is that you clone existing hard drive to SSD, preserving all settings.)
1. Download and install Macrium Refelct Free (link is above).
2. After installation is complete, double-click the Reflect icon on your computer desktop.
3. Under the existing computer icon, click on "Clone this disk..." This will open the cloning window.

4. In the cloning window, click "Select a disk to clone to..." then select the SSD that is connected to the computer via the USB port.
Additional note: Here you can check to make sure that both drives are the same type of disk format (GPT or MBR). Additionally, if your existing hard drive has many small partitions and you are using an SSD of the same or smaller capacity, you may encounter an error saying that not all partitions can fit on the SSD. In this case, you can disable sections on the right side of the main section, which always contains (C:) in its name. This is the partition that contains the operating system.
B. Replacing a hard drive with an SSD.
This last step involves removing the existing hard drive. On most laptops, this is designed simply by placing the hard drive in a bay at the edge of the computer. You can remove it after unscrewing a couple of screws on the bottom of the laptop. Sometimes hard drives are placed under the battery. With desktop computers everything is simpler, where hard drives (3.5-inch versions) are easy to detect as soon as the case cover is opened. You should refer to the user manual or search the Internet for information on how to remove the hard drive specifically for your computer. Please note that for desktop computers, some SSD drives come with a 3.5-inch bay adapter to make them suitable for desktop use. However, if your SSD does not have such an adapter, you can leave the SSD hanging inside the computer case. Since SSD drives have no moving parts and the desktop computer is typically not moving, there is virtually no harm in leaving the SSD hanging freely inside the case (just make sure it doesn't touch anything).Once the old hard drive is removed and the SSD is installed, make sure you tighten all the screws when installing the SSD. In my experience, if you're left with a screw or two, you've done something wrong.

Now that the SSD has been installed, keep the old hard drive in a safe place as a permanent backup. Or you can also use it with a USB-to-SATA adapter as a drive for your current backup. On a desktop computer, you can actually still use the old hard drive as a secondary one, as long as you have room for it inside the computer case.
Reboot your computer several times to allow the operating system to get used to the new SSD. Don't worry, your computer will now boot noticeably faster.
Hello admin. I read your article about replacing the hard drive on a laptop with an SSD and I want to ask you.
I have an ASUS K50C laptop and it is so slow (Celeron 220 1200 MHz processor and 2 GB DDR2 800 MHz memory) that it’s just brutal. Do you think that in my case, replacing the HDD with an SSD will make the laptop faster? I increased the 2 GB RAM to 4 GB and nothing changed, the brakes did not disappear. I don’t play games, I work in office applications and use the Internet.
I would like from you not just words that yes, everything will work faster, but also the results of some tests. And another question, if after replacement I install the remaining HDD from the laptop instead of the drive (using the SlimDVD adapter) , then will it be detected in the BIOS and is it possible to install an operating system on it?
Hi all! I read this letter while at work and thought about where I could get a similar model, we haven’t had it on sale for a long time, and it’s not on disassembly, and then the idea crept into my head to disassemble my partner’s work laptop, just the ASUS K50C, because he I took my new laptop apart ten times and experimented with something, so today we’ll disassemble his device for the sake of a scientific experiment, I think he won’t mind
The ASUS K50C laptop we are reviewing today is a budget model and was created not for gaming, but for everyday work in office applications and the Internet.

How will it behave on a regular budget laptop? Is there any point in such a replacement? Will our laptop become faster after installing an SSD in it? We will find out about this at the end of the article!

Before replacing the HDD with an SSD, let's test the hard drive with the well-known CrystalDiskMark program, this small utility will measure the speed of reading and writing data to the hard drive. After installing an SSD solid-state drive on the laptop, we will also conduct tests and compare them with those previously obtained from a simple HDD.
Official website of the CrystalDiskMark program
http://crystalmark.info/download/index-e.html
CrystalDiskMark is downloaded in an archive, unzip it into a folder and run executable

CrystalDiskMark writes and reads information on the hard drive in blocks (1024Kb, 512Kb, 4Kb);
Select drive C: click on the button All and it happens:
Seq: Sequential write/read test (block size= 1024Kb);
512K: Random write/read test (block size = 512Kb);
4K : Random write/read test (block size = 4Kb);

Friends, let’s remember the test results, but I especially advise you to remember what is hushed up by all hard drive manufacturers - the random write speed in 4 KB blocks (then we will compare it with SSD). In real life, a hard drive, for the most part, writes data in small blocks and inIn our case, the write speed is terribly low 0.385 (this is typical for most conventional HDDs).
Disassembling the ASUS K50C laptop
Disassembling the ASUS K50C laptop is very simple.
Turn off the laptop and unplug it from the power supply, turn it over. Remove the battery compartment cover.

Carefully press the two latches and remove the battery (this must be done).

Unscrew the first screw securing the cover.

Unscrew the four screws located on the back of the laptop, two at a time; left and right

We do not remove the back cover of the laptop, but move it.

Unscrew the screw securing the drive and remove it. We also unscrew the four screws securing the hard drive and carefully pull the silicone tab to the right to remove the hard drive.


Unscrew the four screws and remove the “sled” from the HDD.


The laptop HDD and SSD have the same 2.5-inch form factor, which means the sleds can be installed on a solid-state drive without any problems.

Where to put the laptop hard drive?
There are two options.
For a laptop HDD, you can buy a nice one and use it as a portable USB hard drive.
In short, there are many options, choose any one.
In this article I propose install laptop HDD in adapter SlimDVD instead of a disk drive, the installation process itself is described in detail in the article, the link to which I gave just above, here I’ll just note that you need to secure the HDD in the adapter SlimDVD as expected

then transfer a special mount to it from the drive

We install a solid-state drive and an adapter with HDD into the laptop.

We secure everything with screws.

Reinstall and secure the laptop cover with five screws. We install the battery and close it with the lid.


Turn on the laptop and go to the BIOS in the Boot tab, here we need the option Hard disk drives (determining the primacy of hard drives).
searching results

We enter it and see that both of our drives are identified: a regular Seagate HDD connected via a SlimDVD adapter and a Kingston SSD solid state drive, we can make any of them a priority for booting the laptop and we can install the operating system on either one. Typically, an operating system is installed on an SSD, and a regular HDD is used to store files.

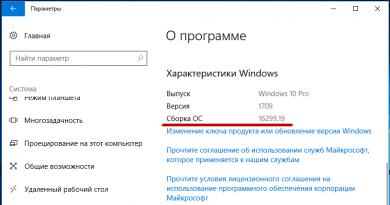
We install the Windows 7 operating system on the Kingston SSD and run the drive test in the CrystalDiskMark program.
Result
Test of sequential writing/reading of information in blocks 1024- 512Kb on SSD is twice as fast as on HDD, and 4Kb blocks 20-30 times.
IN In real operating conditions of a hard drive, writing/reading small blocks will occur much more often than large ones, so the solid-state drive will work faster than a regular HDD.


Conclusion:
Friends, I do not urge anyone to urgently change their laptop hard drive to a solid-state drive, and the article is given to you primarily for your information.
If you are a computer enthusiast, I will advise you this; Install an SSD drive on your laptop and install Windows 7, 8.1 on it, work like this for several days, and then return the regular HDD to the laptop and you will immediately feel the difference in speed.
Read step-by-step guide on how to select and install a hard drive on your PC. And also, the features of transferring the operating system from one hard drive to another (new). A modern personal computer is a complex electronic device that includes a set of various components that ensure its fast and reliable operation. The main criteria of a computer are its performance and speed, response time and system loading speed, information processing speed.
For these purposes, a personal computer requires a certain space for installing the operating system, a place to store information used to solve internal system problems, and free space for installing and storing various applications and programs that will be installed directly by the user for his own needs.
Usually, no matter how much space there is on the hard drive initially, during operation it steadily decreases and is filled with various applications and user files. Therefore, quite often there is not enough free space on the hard drive and you always want to increase it. The presence of large free disk space allows the system to use it to increase the performance of the personal computer as a whole. That's why upgrading your hard drive is one of the easiest ways to improve the performance of your personal computer, whether you just want to add more storage or want to increase system speed by installing an SSD "SSD". In this guide, we will try to describe the procedure for selecting and installing a new disk on your personal computer.
Content:
Step One: Selecting a New Drive
Choosing a drive that fits your budget and can perform the tasks you expect is the first step. It's quite a difficult choice between a traditional hard drive these days. "HDD" and solid state drive "SSD". Everyone must decide this for themselves, based on their needs and capabilities.
Should you use a regular hard drive, or "SSD", or is it better to use both?
Before purchasing a specific disk or drive, each user must answer one question: “What interests me first: increasing the speed or the amount of available memory?”.
Modern SSD drives perform remarkably well and are worthy of an upgrade in almost any system. Switching from a regular hard drive to a storage drive "SSD" increases loading speed and system performance on your personal computer several times. You'll start working much faster, loading applications and large files faster, and seriously reducing the time it takes to load most modern games. However, the main problem is that the price of sufficiently large drives "SSD"(terabyte and above) is prohibitively large and significantly exceeds the cost of analogues among standard hard drives.
As an alternative to a solid state drive "SSD" protruding standard hard drive "HDD". Conventional hard drives are slower, but in return they offer a huge amount of free storage space at a relatively low cost, especially compared to a storage drive. "SSD". You can easily find hard drives with a capacity of four terabytes - enough to satisfy any need (except perhaps the most demanding media storage, for which special servers or arrays are suitable), for no more than $100.
You can also combine the benefits of SSDs together "SSD" and regular hard drives "HDD". If your personal computer allows you to use more than one drive (and the vast majority of them do), then you can install your operating system on the main drive "SSD" for quick access to programs and essential files, and use a traditional high-capacity hard drive to store files. The drive does it "SSD" especially attractive if you already have a regular hard drive in your computer. In this case, you can easily reinstall or move the operating system to the drive "SSD" and store all information on the remaining hard drive "HDD".

If you decide not to spend money, or you are limited to connecting only one drive in your laptop, for example, then you can spend a significant amount of money and purchase a multi-terabyte drive. "SSD". But for most users, using an SSD "SSD" small capacity combined with a large capacity hard drive is an excellent compromise.
What physical disk size should I choose?
 "HDD" usually come in two sizes: "2.5"(Small Form Factor - "SFF") And "3.5"(Large Form Factor - "LFF"). "3.5-inch" disks, also known as "full size" or "desktop disks", these are disks oriented mainly for use in desktop computers. Almost every desktop personal computer has room for at least one (and sometimes more) "3.5-inch" disks. A possible exception to this list are super small form factor computers, which can only use "2.5-inch" disks.
 "2.5-inch" drives are traditionally designed for laptops, but are also great for desktop personal computers. Some desktop computers have built-in mounting points for "2.5-inch" disks. If you do not have such mounting points, then you will need a special mounting bracket, which you can purchase additionally. Please note that such brackets are usually marked as "SSD mounting brackets". This is because all SSDs in the traditional hard drive form have "2.5-inch" size.
And, continuing the conversation about storage devices "SSD", there is one more form factor to discuss: this is the standard "M.2", which is used to implement high-performance solid-state drives used in compact devices (tablets, ultrabooks). These drives are actually more like a memory stick than a standard hard drive. Instead of connecting to the motherboard via cable "SATA", just like regular disks do, standard disks "M.2" connected to a dedicated slot. If you are interested in such disks, then you first need to determine whether your personal computer supports their installation.
There is one more feature of laptops. As laptops have become smaller and sleeker in shape, they have also become more difficult to upgrade. Most laptops that aren't super tiny still use "2.5-inch" drives, but they may or may not grant access to that drive bay to the average user. Bulkier laptops and several business class laptop models such as "Lenovo ThinkPad" or "Dell Latitude", provide easy access to the drive bay. Other laptop models may require more complex, time-consuming work to access the drive bay, or may not have access at all, especially if they have upgraded to an expensive standard "M.2". If your laptop or computer is still under warranty, any replacement will void the warranty, and you need to keep this in mind before you decide to make any changes to your computer's configuration.
What connection should I use?

All modern "3.5-inch" And "2.5-inch" disks use "SATA connection" for power supply and data transmission.
If you are installing the drive on a standard personal computer, then the power cable "SATA"- This is a fifteen-pin cable that runs from your computer's power source. If your personal computer only offers older four-pin cables "Molex", you can buy special inexpensive adapters that do an excellent job.
Data cable "SATA" requires your motherboard to support "SATA connection"(this applies to all modern computers), and can be presented in several different configurations. Some cables have a straight connector at one end and "L-shaped" connector at the other end. "L-shaped" The connector makes it easy to install into slots that are located fairly close to other computer components. Some cables "SATA" have straight connectors on both sides (for example, as shown in the figure below), or, conversely, have "L-shaped" connectors on both ends. When you purchase a hard drive, you receive cables along with it. But if you have limited space to install the drive, then keep in mind that there are different cable configurations that you can use.

If you are installing a drive in a laptop that allows the user to directly access the corresponding compartment, then the entire installation procedure is quite simple. You can usually plug the drive directly into a slot that already has power and data connections—there are simply no cables to connect it to.
A few more words about "SATA" disks. Latest version of the standard "SATA" is the version "SATA 3.3", and the discs and cables are backwards compatible with older versions. For regular personal computers, you need to make sure that the drive you buy works as well as or faster than the connection your motherboard supports. Most connections "SATA" for motherboards over the last five years support at least version "3.0". The same goes for the cable. "SATA" which you are buying. Laptops don't use SATA cables, so just make sure the drive you're upgrading to is using the same version "SATA" or newer than the drive you are replacing.
How much disk storage do I need?
Everything is quite simple: based on the availability of tasks required for disks and the capabilities of your budget. Drives with more storage capacity are correspondingly more expensive than drives with smaller capacity, regardless of the type of drive you are considering (Solid State Drives "SSD" or regular hard drives "HDD"). You need to find a middle ground that meets your disk requirements and your financial capabilities. Then you can decide what size disks you will use.
How fast should my drive be?
As in the previous paragraph, the default response is: "As fast as you can afford". However, if you are upgrading from a regular HDD to an SSD "SSD", you will be pleasantly surprised by the significant increase in speed, no matter what. Therefore, it will not be important for you to choose the fastest drive "SSD", since the loading speed compared to a conventional hard drive will be significantly increased. In this case, the desire to get a drive will be much more important "SSD", which has more memory than obtaining even greater speed, which for different drive models "SSD" doesn't vary that much.
If you buy a conventional drive, then its speed is expressed in "RPM"– number of spindle revolutions per minute. The most common disks with speeds are: "5400 rpm"– this is a typical speed for low-cost drives (especially in form factors "2.5"), and drives with rotational speed "7200 rpm". Some high-performance hard drives are available at speeds "10,000 rpm", but in most cases they are simply replaced by faster drives "SSD".

There is also another option here, in case your choice is limited only to a regular hard drive. So called, "Hybrid" drives that combine a large standard hard drive and a small flash memory cache. It won't make your hard drive faster than your drive. "SSD", but file caching can significantly improve performance if you access the same programs and files over and over again. But such a drive may cost slightly more than a standard hard drive.
Step Two: Decide whether to migrate your operating system or perform a clean install again
You bought a new drive and are ready to install it. The next step is to decide whether you want to migrate your operating system to the new drive or just do a clean install and get started with the new operating system. Each method has its pros and cons.
Operating system migration
Full migration of your operating system (and all your personal data and installed applications) means no need to worry about reinstallations "Windows", customize it to your own preferences, and reinstall each of your applications. The downside is that it is a rather slow and tedious process.
If you're moving from one drive to another (as opposed to simply installing an additional drive on your computer), you'll probably want to move your operating system to the new drive instead of installing it again. The bad news is that it is a slow and tedious process. The good news is that doing this is not that difficult. Most new drives come with tools to do this. And if you did not receive a free tool with the disk, then there are other ways to transfer the operating system to a new disk, which you can easily find on the Internet.
If you are using a laptop, then you need to use "USB adapter" "SATA" so that you can connect both drives at the same time. You can install a new drive, perform the transfer, and then decide whether to keep the old drive as additional storage space or remove it.
Performing a clean installation
There are also benefits to performing a clean install of your operating system on a new drive. The main advantage is the fact that you can start over. Your new operating system will not freeze or slow down, but will work without any glitches or errors that could arise after repeated installations and uninstallations of various programs and applications. You can configure the system the way you want and install only those programs and applications that you need at the moment.
At the same time, this is also a disadvantage, since you will have to go through the entire installation of the operating system and additional programs from the very beginning. To be fair, it must be said that this process is faster than completely transferring the system to a new disk. Performing a clean install means you'll only reinstall the apps and games you want. You should also make sure that you have all the installation files for the applications you plan to reinstall. You will need to find them along with all the necessary license information to re-register and activate.
Step Three: Install a New Drive
The steps to install (or replace) a hard drive are slightly different depending on whether you are installing the drive on a laptop or a regular personal computer.
Installing a new drive in a laptop

Different laptop models have different ways to access the drive bay, if such a method is provided by the laptop manufacturer. In some cases, the compartment is quite easy to access. Some business laptop models allow you to replace the drive with just one screw, while others may require you to completely remove the bottom of the laptop or even remove the keyboard. You can usually find the exact instructions by searching online for your manufacturer and specific laptop model.
For example, consider the option of replacing a disk in a laptop "ThinkPad T450". The replacement process is quite typical for similar models that allow you to upgrade your hard drive.
To access the drive, you must remove the battery and then remove eight different screws on the bottom of the laptop. This will release the bottom cover of the case and allow you to remove it from the computer. Next, in one of the corners of the laptop you will see a hard drive. Remove the last screw holding the hard drive in place. Then gently pull the disc and move it slightly to the side to release it from the built-in "SATA connections", and remove the disk from the laptop case. Insert the new hard drive into the free space, carefully connecting it to the built-in "SATA connection", being careful not to damage it, and secure the new hard drive into the computer case with the retaining screw. Reinstall the housing cover, secure it with screws, and replace the battery. This completes the procedure for replacing the hard drive in a laptop.
Again, the entire hard drive replacement process will vary greatly depending on what kind of laptop you have. If you need step-by-step instructions for your specific laptop model, then you can use the wide possibilities of the Internet and find it either on the manufacturer’s website, or use the advice of other users who already have experience with such replacements.
Installing a new disk in a regular personal computer
This process is a little more complicated than on a laptop, but the good news is that accessing the drive is usually much easier than on most laptops.
You will need a standard Phillips screwdriver and cable "SATA". If you are completely replacing one drive with another, then you can use the old cable "SATA", which is already installed. Your power supply may have an open connection "SATA power supply"– Multiple connectors are often available. But if there is no free connector, then you will need an adapter cable. If you assembled your computer yourself, then the necessary screws for securing the hard drive must initially be installed in the computer case. If not, check the kit of spare parts that came with the case.
Unplug the device, disconnect all external devices and power cables, and then move the computer case to the work area. We recommend using an empty, flat, free space (such as a table) that has ample access from all sides, and preferably without a carpet underneath. If you know the configuration of the internal parts of your computer well, then place the case at any accessible angle that is convenient for you, or you can simply leave it vertically. To access the inside of your computer, you will have to remove one or more of the chassis panels.

Remove the access panel cover, which is located on the left side of the computer case when you are looking at your computer from the front. Most designs require you to remove two or three screws from the back, then pull the cover along the body and remove the panel from its retaining hinges. Some personal computers require you to remove the cover from the entire case, not just the access panel. If you are not sure what to do, look online for instructions for your case model. This shouldn't be too difficult and you can easily find it.
Take a minute to get your bearings and look at the configuration of your computer's internals. You should see the motherboard with a boxed power supply either on the top or bottom of the case, and your computer's drive or drives installed in the front of the case. Data cable "SATA" must be connected from the motherboard to the drive, and the power cable "SATA" must connect the drive and power supply.
Note: If you do not see a large "3.5-inch" or less "2.5-inch disk", then it can be installed in another location. In newer designs, the drive is often located behind the motherboard itself, so you will need to open the opposite panel to gain access.
If you decide not to leave your old drive in your computer as an additional storage drive, then it's time to remove it. You can leave the cables with which your drive was connected to the motherboard and power source and connect them to the new drive after installing it.
First, disconnect the data and power cables from the back of the old drive. There is nothing complicated about this: just pull them out from where they are attached to the disk. Some cables have a small latch mechanism that you will have to squeeze first to release them.
The drive is fixed on a special shelf using screws. The screws come in a variety of sizes and lengths (some of which include silicone spacers for sound deadening) and can be mounted on the bottom of the drive or on the side, depending on your case design. It doesn't matter, just use a screwdriver to unscrew the drive mounting screws and set them aside so you don't lose them. Now take out your disk and carefully put it away. Be careful with it so that, if necessary, you can use it again here or in another device.
Repeat the entire process in reverse, install a new drive to replace the old one and secure it firmly with screws in the appropriate places. Now connect the cables to the new drive. Each cable fits only to its connector with the corresponding side, so you can’t go wrong when connecting.
If you are adding a new hard drive and the old drive is still in place, the procedure is a little more complicated. You will need to install the hard drive on a shelf (choose any suitable shelf from the available set) and secure it with mounting screws in the appropriate locations, and then connect the drive with additional cables.
Connect one end of the data cable "SATA" to the back of the new hard drive and the other end to the motherboard. Motherboard slots are typically located on the side toward the front of the computer in a cluster that has two to six slots. It doesn't really matter which connector you use, although you can daisy chain it to the nearest connector to keep the computer unit's internal organization organized.
Now connect the power "SATA" from the power supply to the new drive. If you already have a drive installed, check the power cable from it because they usually have multiple plugs allowing them to be used for multiple drives. If your power supply does not have free power connectors "SATA", then you will have to use an adapter or splitter.
Now all the main work is finished and your hard drive is completely ready for use. Be sure to check all connections and make sure the cables are not touching any radiators or cooling fan blades. Then install the previously removed body panels in place and secure them with screws in the correct places. Return your computer to its original position, reconnect all external devices and power cables, and start it up.