Copy the cryptopro key to another medium. How to copy a certificate and private key from the registry. How to copy a private key from the registry
To perform any actions on the digital signature, copy the digital signature, delete or install it, you need the CryptoPro program installed on your computer.
- In order to copy the digital signature, you need to go to Start-All Programs-CryptoPro and run the CryptoPro CSP file.
- Next, go to the Service tab.

- Click on the “Browse” button.

- Select the required container and click “OK”.

Note:
In the image above, you can see the presence of two columns: On the left is the “Reader” column and on the right is the “Container Name” column. This information will help you decide which digital signature to copy.
The inscription “Register” in the reader column means that the digital signature is on the computer. Otherwise, the digital signature is located on some medium (flash drive, floppy disk or secure media). In the case shown in the image, there are three digital signatures recorded on the computer and one signature recorded on Rutoken.
You can understand which certificate you need to copy by looking at the “Container Name”. The “container name” is made up of the serial number, the date of issue of the certificate and the name of the organization.
In the case we are considering, we choose the digital signature located on the protected Rutoken media.
- Select and copy the container name, click “next”.

- Paste the container name copied in step 5 into the “Key container name” field, add any few characters or spaces and click the “Finish” button.

- Next, we need to select the location where we want to copy the digital signature. This could be a computer, flash drive or secure media. And click ok.

Note:
In the case we are considering, we copy the digital signature to a flash drive by selecting its name in the list of devices. If you need to copy your digital signature to your computer, you should select “Register” from the list of devices.
- Next, the system will ask you to create a password for the container. If you do not want to create a password, then leave the fields blank, as shown in the image. And just click “OK”.

This completes the digital signature copying.
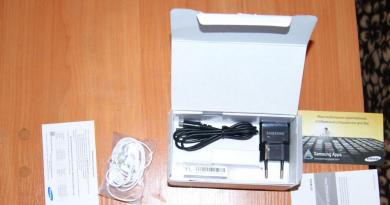
VLSI uses the CryptoPro CSP program to work with keys. The key is in the container, and the container is on the carrier. In my work I use media: Rutoken, Jacarta, registry and flash drive. There is always one key in the container. You can place many containers on one carrier, as long as there is enough space.
CryptoPro does not see the computer's hard drive as a storage medium, so I cannot copy the container to it!
You can copy the key in different ways. I know five.
- CryptoPro CSP: Service - Copy. Figure 2. This is the basic and universal method. I can select any key and copy it to any available media.
- On the website online.sbis.ru: Employees - Electronic signatures - Other operations - Copy existing ones.
- In the VLSI program: Taxpayer Creation Wizard - Make a backup copy of the electronic signature.
- Key on the flash drive: copy a directory with extension .000, which contains 6 files.
- Key in the registry: upload the registry branch to a file, replace the user code and load. At first glance it is difficult. But when there are a lot of keys, then this is the fastest way. When copying, the names of the containers are preserved. Search Yandex for words for 32 or 64.
Figure 1. Open CryptoPro
Figure 2. CryptoPro - Service

An example of transferring a key using CryptoPro
The registry is part of the Windows operating system. You cannot remove the registry or part of it from the computer and take it to a second one. You can copy the key from the registry to removable media. All removable media (flash drive, token) can be removed from the first PC and inserted into the second.
Suppose I have 5 keys in the registry, and I want to transfer them to the registry on a second computer.
First of all, I look through all the containers in CryptoPro (Service - View certificates in a container) and write them down on a piece of paper. I make a list: the first 3 letters of the container and a name that I understand.
Then I copy it to a flash drive (Service - Copy). When copying, I set a new name in Russian so that in the future it will be convenient for me to use it. Example, 1601 Dandelion, where 16 is 2016, 01 is January, Dandelion is Dandelion LLC.
I take the flash drive to the second computer and copy it from the flash drive to the registry in the same way. I add a dot at the end to the container name so that the names are different.
What password?
When the key is on a flash drive or in the registry, the user can set a password, and then each time the key is accessed, the password must be specified. To avoid typing the password every time, you can save the password. You can view the saved password with the command:
csptest -passwd -showsaved -container "container name"
When the key is on the token, then instead of the password for the key, the PIN code is used, which is specified when formatting the token.
I have already described earlier: How to install an electronic signature on a computer. Today I want to expand on the topic of working with electronic digital signatures and tell you how to copy an electronic signature from a flash drive to the registry.
Any article can be roughly divided into two questions: Why and How.
For what? The digital signature is issued on a flash drive or, simply, on a flash drive.
Firstly: a flash drive is not an eternal thing, it can break or get lost.
Secondly: we are surrounded by many computers. A computer at home, a computer in the office, and when we travel we take a laptop with us. And as you might guess, you have to wear a signature all around, which can break and get lost. Perhaps I'm exaggerating, but it's much easier to copy it.
How? Go to Start/Control Panel/CryptoPro CSP and click on the subheading: Service and click: Copy.

In the next window click: Review, select the key container and OK.


Here we click on Registry And OK.

Now let's install the copied certificate.
Tab: Service, click on the button: View certificates in container.

Select, as shown in the image, Reader: Registry, Container Name: Your certificate (the name you gave). Click OK and in the next window Further.

Copying the certificate is complete, there is no longer a need to insert a USB flash drive for signing.
How to copy the key?
VLSI uses CryptoPro to work with keys. The container with the key is located on the carrier. In my work I use media: Rutoken, Jacarta, registry and flash drive. You can place many keys on one medium, as long as there is enough space.
CryptoPro does not see the computer's hard drive as a storage medium, so I cannot copy the container to it!
You can copy the key in different ways. I know four.
- CryptoPro - Service - Copy. Figure 2. This is the basic and universal method. I can copy from the registry to a flash drive or to Rutoken, i.e. I can take it on any available medium and copy it to any.
- VLSI program - Taxpayer Creation Wizard - Make a backup copy of the electronic signature. This method requires an installed VLSI program. You can select any key and send a copy to any available media.
- If the key is on a flash drive, you can copy a directory with extension .000, which contains 6 files.
- If the key is in the registry, you can copy the registry entry to a file, replace the user code and upload it. At first glance it is difficult. But when there are a lot of keys, then this is the fastest way. When copying, the names of the containers are preserved. Search Yandex for words for 32 or 64.
Figure 1. Open CryptoPro

Figure 2. CryptoPro - Service
Transfer using CryptoPro
The Windows registry is located on the system drive, and all other media can be removed from the first PC and inserted into the second. Therefore, the difficulty with transfer arises only with keys in the registry.
Suppose I have 5 keys in the registry, and I want to transfer them to the registry on a second computer.
First of all, I look through all the containers in CryptoPro (Service - View certificates in a container) and write them down on a piece of paper. I make a list: the first 3 letters of the container and a name that I understand.
Then I copy it to a flash drive (Service - Copy). When copying, I set a new name in Russian so that in the future it will be convenient for me to use it. Example, 1601 Dandelion, where 16 is 2016, 01 is January, Dandelion is Dandelion LLC.
I take the flash drive to the second computer and copy it from the flash drive to the registry in the same way. I add a dot at the end to the container name so that the names are different.
How to copy a container with a certificate to another medium
Copying using Windows
If you use a floppy disk or flash drive for work, you can copy the container with the certificate using Windows (this method is suitable for versions of CryptoPro CSP no lower than 3.0). Place the folder with the private key (and, if there is one, the certificate file - the public key) in the root of the floppy disk / flash drive (if you do not place it in the root, then working with the certificate will be impossible). It is recommended not to change the folder name when copying.
The folder with the private key should contain 6 files with the extension .key. As a rule, the private key contains a public key (the header.key file in this case will weigh more than 1 KB). In this case, it is not necessary to copy the public key. An example of a private key - a folder with six files and a public key - a file with the extension .cer.


Private key Public key
Copy to Diagnostics profile
1. Go to the “Copying” Diagnostics profile using the link.
2. Insert the media to which you want to copy the certificate.
3. On the desired certificate, click on the “Copy” button.

If a password has been set for the container, the message “Enter the password for the device from which the certificate will be copied” will appear.

4. Select the media where you want to copy the certificate and click “Next”.

5. Give the new container a name and click on the “Next” button.

6. A message indicating that the certificate was successfully copied should appear.

Bulk copy
- Download and run the utility. Wait for the entire list of containers/certificates to load and select the required checkboxes.
- Select the "Bulk Actions" menu and click on the "Copy Containers" button.
- How to get the entire pension for a deceased husband? the deceased’s pension is 17 thousand, mine is 11,200. They added 2 thousand and for a non-working daughter 1 thousand. I suspect unauthorized actions of an official [...]

3. Select the media to store the container copy and click OK. When copying to the registry, you can check the box “Copy to the key container of the computer”, then after copying the container will be available to all users of this computer.

4. After copying, click the “Update” button at the bottom left.
If you want to work with copied containers, you need to install certificates.
Copying using CryptoPro CSP
Select Start > Control Panel > CryptoPro CSP. Go to the “Service” tab and click on the “Copy” button.

In the “Copy private key container” window, click on the “Browse” button .

Select the container you want to copy and click on the “Ok” button, then “Next” . If you copy from a root token, a pin code entry window will appear in which you should enter the standard pin code - 12345678.

Create and manually specify a name for the new container. Russian layout and spaces are allowed in the container name. Then click "Done".

In the Insert Blank Key Media window, select the media on which the new container will be placed.

You will be prompted to set a password for the new container. It is not necessary to set a password, you can leave the field blank and click on the “Ok” button . If you lose your password/pin code, using the container will become impossible.

If you copy the container to a ruToken smart card, the message will sound different. Enter the standard pin code - 12345678.

After copying, the system will return to the “Service” tab of CryptoPro CSP. Copying is complete. If you plan to use a new key container to work in Externa, install it through Crypto Pro.
www.kontur-extern.ru
How to copy a container?
If a flash drive or floppy disk is used for work, copying can be done using Windows (this method is suitable for versions of CryptoPro CSP no lower than 3.0). The folder with the private key (and the certificate file, if any) must be placed in the root of the flash drive (floppy disk). It is recommended not to change the folder name when copying.
The private key folder should contain 6 files with the extension .key. Below is an example of the contents of such a folder.

Container copying can also be done using the CryptoPro CSP crypto provider. To do this you need to follow these steps:
1. Select Start / Control Panel / CryptoPro CSP.
2. Go to the Tools tab and click on the Copy button. (see Fig. 1).

Rice. 1. “CryptoPro CSP Properties” window
3. In the window Copying a private key container press the button Review(see Fig. 2).

Rice. 2. Copying the private key container
4. Select a container from the list, click on the button OK, then Further.

Rice. 3. Key container name
6. In the “Insert and select media to store the private key container” window, you must select the media on which the new container will be placed (see Figure 4).

Rice. 4. Selecting a blank key media
7. You will be prompted to set a password for the new container. Setting a password is optional; you can leave the field blank and click on the button OK(see Fig. 5).

Rice. 5. Setting a password for the container
If copying to media Rutoken, the message will sound different (see Fig. 6)

Rice. 6. Pin code for container
Please note: if you lose your password/pin code, using the container will become impossible.
8. After copying is completed, the system will return to the tab Service in the window CryptoPro CSP. Copying is complete. If you plan to use a new key container to work in the Kontur-Extern system, you must install a personal certificate (see How to install a personal certificate?).
How to copy a CryptoPro private key container?
To copy the private key container, run Start → Programs → CryptoPro → CryptoPro CSP and go to the tab Service.

Click the button Copy.

Clicking the button Review select the key container required for copying and click OK.


Enter a name for the new key container and click the button Ready.

After entering, click the button Ready. The system will display a window in which you must select the media for the copied container.
A window for setting a password to access the private key will open. Enter your password, confirm it, and click the button OK. CIPF "CryptoPro CSP" will copy the private key container.

Minutes of a parent meeting on traffic rules with the participation of a traffic police officer Svetlana Shigapova Minutes of a parent meeting on traffic rules with the participation […]
If the electronic signature was issued to the PC registry, then you can copy it to a medium using the following instructions.
Step 1. Open CryptoPro and go to the “Service” tab, then click on the “Copy” button as shown in the instructions.
Step 2. In the window that appears, click the “Browse” button to select the electronic signature container you need to copy.

Step 3. In the list of existing containers that appears, select the container you need, which you need to copy to the media and click the “OK” button.

Step 4. Confirm the action by clicking the “Next” button in the window that appears

Step 5. In the window that appears, specify the name of the new container that will be created on the media. The name in the field is entered automatically, so you can simply leave it unchanged. Click the "Done" button.

Step 6. A media selection window will appear. Select the desired medium from the list to which you want to copy the electronic signature. In order to understand which media to select from the list, look at the “Inserted media” field: it will either say “Media is missing,” which means you have selected a non-existent media, or the media name will appear similar to the name in the screenshot. Select and click OK.

Step 7. After you select the media, a window will appear to enter the PIN code for the new electronic signature container. We recommend entering the standard PIN code “12345678”, because... clients often forget or lose their PIN codes, after which the electronic signature has to be reissued. You can set your (different) PIN if you are sure that you will not lose it. After entering the PIN code, click the "OK" button.

Ready. Now the electronic signature container has been copied to the selected medium and you can use it.
If you don’t want to understand these details, we will help. You can even call our engineer to your office.
The owner of the private EDS key is personally responsible for its storage!
Why are keys distributed on floppy disks?
The floppy disk was and still remains the most accessible and cheapest medium on which you can write a fairly long key combination of characters. It is precisely because of their low cost and ease of use that many companies continue to distribute key information, including digital signature keys, on floppy disks, despite the fact that the reliability of floppy disks by modern standards is less than satisfactory, and disk drives are almost never seen anymore.
Why do you need a token, why copy the keys onto the token
USB tokens are much more reliable than floppy disks and are protected from physical factors. In addition, tokens provide cryptographic protection of stored information. Unlike floppy disks, to access information in the token’s memory, you need to know a special pin code. Another significant difference between USB tokens and floppy disks is the installation of a special driver on the system.
So why copy the digital signature key from a familiar floppy disk to an unusual token?
There are several reasons. Firstly, this is the absence of a disk drive on the computer on which the owner of the digital signature key will work. If you can still find a computer left over from ancient times, equipped with a disk drive, then expecting that serious work is being carried out on such antediluvian equipment would be too bold an assumption.
Secondly, anyone who has encountered floppy disks in their life knows that it is better to immediately duplicate the information on a floppy disk, due to the extreme unreliability of these same floppy disks!
And thirdly, even a schoolchild can steal an EDS key from a floppy disk from a careless user, while it is almost impossible to read information from the token’s memory without knowing the secret pin code.
Conclusion: the most correct thing would be to purchase a USB token (Rutoken), copy the digital signature key onto it, put the floppy disk in a safe, and hang the token with the digital signature key on a key ring. This will allow you to use your digital signature key at any time, while eliminating the risks of both its loss and the secret key falling into the wrong hands!
What do we need for this?
To copy an EDS key from a floppy disk to a token, you must have a disk drive and a USB port on your computer. The operating system Windows XP, Vista, 7 was installed. It is also necessary that CryptoPro CSP be installed.
How to find out the version of CryptoPro CSP
First, you need to determine the version of the installed CryptoPro CSP. To do this, you need to go to the Control Panel and launch the CryptoPro CSP plugin. On the bookmark Are common The product version will be indicated.
0 " style="border-collapse:collapse;border:none">
ATTENTION!!!
1. It is very important to correctly determine the version of CryptoPro CSP!
Depending on which version of CryptoPro CSP (3.0 or 3.6) the user has installed, further steps to configure the system will differ significantly!
2. When working with CryptoPro CSP containers on any type of media, during operations with the contents of the containers, it is PROHIBITED to disconnect the media from the computer until the operation is completed! Otherwise, irreversible damage to the contents of the container is possible!
The first step depends on the version of CryptoPro CSP
a) For CryptoPro 3.6 you need to install Rutoken drivers: (http://**/hotline/instruction/drivers/).
b) For CryptoPro 3.0 solution needs to be installed Rutoken for CryptoPro CSP:
(http://**/download/software/rtSup_CryptoPro. exe. zip).
Further steps of the instructions do not depend on the version of CryptoPro CSP
Copy the container from the floppy disk to Rutoken using CryptoPro CSP:
· In the list of containers, indicate the one located on a floppy disk or flash drive. Click on the button OK: |
|
· In the prompt window that appears, enter the password for the selected container, if one has been assigned. Click on the button OK: |
|
· Enter the name of the container that will be created when copying your data to Rutoken. Click on the button OK: |
|
· Connect Rutoken to your computer. · In the reader selection window that appears, you must indicate the one to which Rutoken is connected and click on the button OK: |
|
· In the request window that appears, enter the Pin code of the connected Rutoken device (default:). Click on the button OK: |
|


· Wait until the container is copied to the token (during copying, the indicator on the token will flicker).
Register the certificate in the local certificate store
· In the form that appears, click on the button Review and select the container on Rutoken, copied there earlier, as described in the previous section, click on the button OK: |
|
|
|
· In the certificate window that opens, make sure that the data is correct and click on the button Properties: |
|


· The Certificate Installation Wizard will open, in which you must specify the storage in which your certificate will be placed. As a rule, this is Personal Vault. Select the desired options and click the button Ready:
|
|