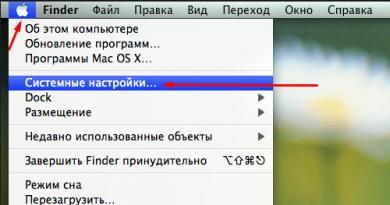
A 3g modem is installed. How to set up an mts modem. Learn more about support for different types of SIM cards
Not so long ago, using 2G Internet was considered something incredible. Now the speed mode of 474 Kbps is nothing compared to 100 Mbps of 3rd and 4th generation devices, the coverage area of which is constantly expanding. Thus, the TELE2 operator presents a line of routers that allow you to use the network both in large cities and in places with no wired connection. And in order to learn how to connect and configure a TELE2 modem, you do not need to have any specific skills.
Connecting and setting up a modem from TELE2 is easy - follow the instructions below
High-speed 3G Internet from TELE2 is a compact device for fast access to the network at any time. Mostly in Russia the coverage area is 2 and 3G, but in large cities a faster 4G version is already available.
Equipment set.
- USB gadget manufactured by ZTE Corp.Technology.
- Sim card with connected tariff.
- USB cable.
- Installation drivers.

Technical data.
- Works on all operating systems (Linux; Windows 7, 8, 10, XP, Vista; Mac OS).
- Max data transfer speed - 11 Mbit/s.
- Max information reception speed is 21.6 Mbit/s.
- Convenient USB interface.
- Works only with TELE2 cards.
- High-speed network 2G and 3G.
- Battery with a capacity of 1500 Amperes.
IMPORTANT. If there is no 3G connection, the router will operate at speeds of up to 64 Kbps.
Installing the TELE2 Internet gadget
Since such devices appeared, setting up the Internet for the TELE2 modem is not particularly difficult. Almost the entire procedure occurs automatically.
- You need to insert the SIM card into the device itself.
- Then connect it to your computer or laptop.
- Then the system itself will detect the hardware and install drivers.
- Once the installation process is complete, a window will appear to install the software on your computer.
- To understand how to connect a TELE2 modem to a computer, you need to launch the installation program and click “Connect”.
- After all these steps, a connection should appear.
IMPORTANT. After setting up the TELE2 3G modem on your computer, the system must be rebooted.

Connecting your phone as high-speed Internet
You can also use your phone as a router. To do this, the mobile phone must be connected to the PC using a USB cable or via Bluetooth by adding new equipment.
- In the Start menu, Control Panel, Sharing Center, Create and set up a new connection.
- Here select “Set up a telephone connection” and “Next”.
- Select the desired device for the device and enter the parameters:
Samsung: *99**1*#
Siemens, Alcatel, Panasonic: *99***1#
Sony, LG, Nokia: *99# - Leave the username and password fields blank.
- Click “Connect”, where after 5 minutes the network should appear.
IMPORTANT. The established basic tariff plan “Internet for Devices” with the “Internet Suitcase” function implies the use of additional options, which allows users to choose the most convenient connection.
Settings Features
Having learned how to connect a TELE2 modem to a laptop or desktop PC, you should, which has its own characteristics.
- By default, the router itself determines the type of connection available in a particular location at a particular time. But the Internet settings for the TELE2 modem also require manual control. And therefore, to create a 3G mode, you need to enable the “Network” option, the “WCDMA” network type, and the “All bands” band. But if there is a very weak signal, then it is better to set the network parameters to “GSM Only”.
- Also, the latest versions of high-speed Internet equipment support virtual network cards. Here, connecting and setting up the TELE2 3G modem may conflict with the operating system. For example, at the stage of obtaining an IP address, the program cannot obtain it. In this case, in the “Options” settings you need to set the connection type to RAS (modem).
- Before connecting the TELE2 modem, you must remove the software for Internet equipment from other operators. Otherwise, the required device will not operate correctly.
Before setting up a TELE2 modem, you must determine the coverage area of this operator, which is constantly expanding. And if the location is in the 3G zone, then there will be no special problems with the Internet, if on the contrary, then a high-speed device will be of little use. Using the TELE2 router is very easy, but if you still have problems, you can contact specialists or look for the necessary information on the operator’s official website.
Reconfiguring 3G modems from various manufacturers for the required operating conditions.
To configure modems, you need to connect either through a hyperterminal or through putty.
Then launch the Hyper Terminal. It is located in the Start menu > Programs > Accessories > Communications > Hyper Terminal, or call the Run applet and type hypertrm.
Here we are trying to configure ZTE MF112, ZTE MF120, ZTE MF626, Huawei E150
1. ZTE MF112 (MTS) – do not have the ability to work with voice transmission from IP ATC
2. ZTE MF626 (Beeline) – Suitable for working with IP ATC
Then in the connection settings window you need to set the following parameters:
Speed: 115200
Data bits: 8
Parity: No
Stop bits: 1
Flow Control: No
A terminal will open in which you can issue commands directly to the device. To check that you are connected to the modem, enter the AT command and press Enter, you should receive an OK response.
AT+ZCDRUN=8(disable CD/Flashdrive autorun)
AT+ZCDRUN=9(enable CD/Flashdrive autorun)
AT+CUSD=1,"#102#",15(check balance for Beeline subscribers)
ATI(returns information about the modem)
AT+ZBANDI=0(Automatic band selection (default))
AT+ZBANDI=1(UMTS 850 + GSM 900/1800)
AT+ZBANDI=2(UMTS 2100 + GSM 900/1800 (Europe))
AT+ZBANDI=3(UMTS 850/2100 + GSM 900/1800)
AT+ZBANDI=4(UMTS 850/1900 + GSM 850/1900)
AT+ZBANDI?(Report band selection mode)
AT+ZSNT=0,0,0(AUTOMATIC network selection, GSM+WCDMA)
AT+ZSNT=0,0,1(AUTOMATIC network selection, GSM+WCDMA,GSM preferred)
AT+ZSNT=0,0,2(AUTOMATIC network selection, GSM+WCDMA,WCDMA preferred)
AT+ZSNT=1,0,0(AUTOMATIC network selection, GSM only)
AT+ZSNT=2,0,0(AUTOMATIC network selection, WCDMA only)
AT+ZSNT?(Returns network selection mode)
Instructions:
Connect the modem to your Windows PC and make sure it works.
Save all files contained on the modem's virtual CD.
Disconnect your computer from the network and the Internet and run the Hyper Terminal program.
The Hyper Terminal program is located in Start > Programs > Accessories > Communications > Hyper Terminal - in Windows XP, and for Windows 7 you need to download it.
In the “Connection Description” window, write any name, say “Huawei,” and press ENTER. We are waiting for the “Connection” window to appear. In its last column “Connect via” you need to select “HUAWEI Mobile Connect – 3G Modem” and click OK.
The next window after this with phone numbers and other parameters just needs to be closed by clicking the “Cancel” button.
Now on the program panel you should click the last button “Properties”:
And in the “Properties: Modem” window that opens, go to the “Options” tab:
Click the “ASCII Options” button:
Check the box second from the top “Display entered characters on screen.”
Click OK. The top window will close. Click OK. The last window will close and the cursor will blink in the main program window.
Turn on CAPS LOCK and type the AT command. Press ENTER. The answer appears: OK. This means the connection with the modem is established. Enter one of the following commands:
AT^U2DIAG=0(device in modem only mode)
AT^U2DIAG=1(device in modem + CD-ROM mode)
AT^U2DIAG=255(device in modem + CD-ROM + Card Reader mode)
AT^U2DIAG=256(device in modem + Card Reader mode)
If it becomes necessary to return the modem to its original state, you must repeat the entire procedure, but with the command AT^U2DIAG=255 (device in modem + CD-ROM + Card Reader mode).
3G modems are usually bought because there is no way to connect to a normal wired high-speed Internet, or you need to constantly access the Internet from a laptop in places where free Wi-Fi Internet is simply not available. Actually, why everyone doesn’t like 3G Internet so much is the high cost, low quality of communication, and the very low speed of downloading files and loading pages. Now we will look at several ways: how you can increase the speed of 3G Internet without much expense.
Each computer, when operating, creates a magnetic field around itself and all kinds of radio interference, the modem is located precisely in this interference field, we cannot remove the interference, but it’s easy to move the modem away. To do this, we need a regular USB extension cable, you can find it in any computer store, the cost is no more than one hundred rubles, more than 1.5 meters long (more than 3 meters is not recommended, otherwise the computer may simply not see the modem). We connect the modem via a cord to your PC. Usually, after this operation, the signal quality increases many times, and surfing the Internet at 3G speeds becomes more enjoyable.
The second method, no less effective, is to lengthen the antenna of a wireless modem; some manufacturers take care of their customers by making a separate output for the amplified antenna in the body of the 3G modem itself. But there are models, usually they are old, that do not have such an output, and in order to extend the antenna you will need to disassemble the device body. To do this, you will need at least some knowledge in the field of electronics and physics; an ignorant person will only damage the device, and its further operation will not be possible. So read a few instructions before you delve into the insides of a 3G modem.
The third method is intended for well-advanced computer users, the method is as follows, on each operating system of the Windows line there is such an MTU setting, it is responsible for the block size in the received packet, in this setting it is possible to set numbers from 256 to 4096, when setting arbitrary numbers measure the maximum speed of your Internet connection. With the correct settings, the signal quality can increase several times. In addition to manually setting the MTU parameter, there is an automatic setting, achieved through the use of , easy to find using any search engine.
The fourth method is used extremely rarely and is usually very expensive, the point is to reflash the modem, unlock its internals, in other words, the modem will work with SIM cards of any operator. You never know which operator in which area provides better internet, so by completing the unlock you will have a chance to compare the speeds of different cellular operators. For most devices there is special software for carrying out such an operation; an experienced personal computer user can manually configure the modem for a different operator. The costs consist only of purchasing a new SIM card and connecting it to the appropriate tariff.
The fifth way is to call the operator and report the low quality of communication, he will ask you to wait and update the information on your tariff, after 15 minutes the speed and signal should increase noticeably.
Setting up a 3G modem is not difficult. How to set up a modem is described by the provider. But this is not the setting that I will talk about. First, you need to understand how the modem works. On the one hand, everything seems clear. It transmits data and receives it. But at what frequency is this data transmitted? And on the opposite frequency. I'll explain. You have set up the connection and started downloading. We moved away from the modem and the speed dropped. I think many people have noticed this. Even if you move your hand around the modem at a distance of 50 cm, the speed of the modem will change. And it changes depending on a bad or improved signal. The fact is that all the signal meters that are offered to us measure the signal at a certain frequency and the measurements do not take into account interference and reflected signals. That is, the indicator shows that the signal is strong although the connection speed is very low, but in fact, it measures interference (network interference, magnetic fields, radiation) or several reflected signals. Yes Yes! Precisely reflected ones. That is, there is a direct signal reflected from you, for example, a second reflected from the wall and many more from him. The modem is in convulsions trying to find the signal it needs and of better quality. If he cannot find it at high speed, he resets the connection speed to ensure reliable data reception. And what did they offer us? Buy antennas!!! And people take it. 50% of people complain about the uselessness of antennas. So what should we do now? I read somewhere on the Internet the phrase As soon as you thought about the Internet, they are already making money and deceiving you!
How can we fight for a good reception and get what we paid for? We make a mistake from the very beginning. When purchasing a 3G modem, you need to take into account the distance to the nearest provider point. Sellers mostly don’t even know this data. So you need to find out for yourself. And when buying a modem, do not skimp, but buy a modem with a reserve of data transmission power. For example, you are 15 km from the provider’s point. So take at least 20-30 km. whatever there would be in reserve. This is the first.
Now we have purchased and installed a modem. The settings are available on all websites of the provider. There is no need to reflash the modem; this rarely helps. And it helps mainly only when it is not working adequately. The main thing is to set up a high-quality reception. I struggled for 4 years and finally figured out what was what. No acceleration programs really help and often result in another problem. These programs also make money for us. If they are paid.
You cannot configure the modem for a high-quality signal in one go. It takes several days to find exactly that point of reliable reception. On the Internet I found the only program that can be used to focus on signal reception. This is the SpeedConnectStartUp program. I downloaded it for free, I've been using it for a long time and it works great. It sets up your Internet connection, you just need to configure the program. Namely, enter the data, see the picture. Setting at 230KB/s.
Now, after connecting to the Internet, launch the program and check that the settings are correct. The program does this itself. If the Internet connection settings are not correct, press the buttons. And the program will fix everything.
About an hour or so, click the program icon and select Show Network Activity and a window appears that you need to look at when searching for a good signal. The window shows the speed of the downloaded data. Therefore, when setting up, it is better to download a larger file and calmly configure the signal.
I am located 8 km from the provider's point. I bought a 2 meter USB extension cable. And now I can move it. When searching for a reliable signal, you need to move the modem literally one centimeter at a time. A confident signal appears in the most unexpected places. I don’t have direct visibility to the provider’s point. The modem is now in the corner on the desk lamp. It moves in any direction and when the weather is bad, I move it a little and swing at the same speed as in good weather.

This is CDMA mode with excellent data reception! It's the easiest to set up.

And this is already a speed of 230 KB/s. But the reception is bad. These interruptions in the download signal indicate this. Therefore, you need to move the modem in different directions, looking for good reception. When increasing the speed, do not forget to move away from the modem and check whether the download speed changes or not. If it changes a lot, continue searching.

This is already set to a good signal. Therefore, the speed is good up to 300 KB/s. Now one more important detail. The provider made a priority system. That is, if you have a bad signal, then part of the traffic is taken from you and given to someone else. Therefore, if it is clear that the download peaks reach the maximum, but there are still breaks, you need to disconnect the connection and reconnect. Sometimes you have to do this several times. I shared this information because I am currently using it. Moreover, he did not set up or clean the system. Everything works even on Pentium 4 without any brakes. Good luck finding the signal.
There is nothing complicated here, when you buy a modem it comes with instructions that even a schoolchild can figure out, you can find the password and SIM card in the same box in which the modem is located, read the instructions correctly, everything is written there.
Insert the modem into your computer (laptop) and install the program. For example, a Megafon modem (if the operator is a megaphone). Insert a SIM card with a tariff plan there; if there is no TP plan, you can select it in your personal account on the operator’s website. Then click on settings, General types: Run the program along with the OS, Connect at startup, call back when the connection is lost, and others. Place a check mark where needed. Usually you don't need to put it everywhere. Except for the type: enter PIN code verification at startup? Unnecessary hassles. Next, look for the network. There is manual and automatic search. Set the network. For example: priority
3G, that is, if it is caught, it will not catch 3G, but if not, then switch to 2g. Click find. They write: wait, search is in progress. After the network is found, click: register. And you configure everything as it should and use the Internet. I would like to note on my own that it’s good to have the same operator as your phone number so that you can receive support over the phone if you need anything. In general, you can do everything in your personal account: change the tariff plan and select Internet options, look at promotional rates, etc. Choose the tower modem of which operator is closest to you, accordingly the signal and quality are better. To do this, talk to your neighbors if possible. If not, contact sellers of nearby stores; they usually know which operator in a given area has the most reliable signal reception, and, accordingly, the best Internet. Good luck to you.
After changing the tariff to unlimited and with increased speed, I started thinking about buying a new Wi-Fi router. Otherwise, my old RT-N13U B1, which worked for several years with a modem from the Intertelecom provider, is already a little tired. It began to frequently cut off the network, devices refused to connect and it often just had to be rebooted. To replace it, I bought an Asus RT-N18U. New, good model with two USB ports. Asus RT-N18U also supports 3G/4G USB modems (instead of a modem there can also be an Android phone), and can distribute wireless 3G Internet via Wi-Fi and network cable to all your devices.
We will talk in more detail about the Asus RT-N18U router itself in a separate article. And on this page, I want to show you the process of setting up an Asus router to work with a 3G modem. These instructions are suitable for all Asus routers that support USB modems (USB 3G WAN port) and have a new firmware version (dark).
Asus routers that support 3G USB modems:
RT-AC87U, RT-AC55U, RT-N56U, RT-N14U, RT-AC51U, RT-N66U, RT-N65U, RT-AC52U, RT-AC3200, RT-N18U, DSL-N17U, RT-N10U B, RT -AC66U, RT-AC56U
These are not all models. But, this list contains the newest models for which this instruction is suitable.
All these models support USB 3G modems. Asus has a lot of such devices. There are both very expensive models and more affordable ones. In any case, if you want to distribute the Internet via a Wi-Fi network from a 3G modem, then you can easily select a suitable router for yourself.
By the way, it is very important that the router supports your modem so that they are compatible. This must be checked before purchasing. Asus routers have a very decent list of compatible modems. The compatibility list can be viewed on the official website, following this link: https://www.asus.com/event/networks_3G4G_support/. In the table we look for our country, look at the provider and models of compatible modems.
I will be setting up an Asus RT-N18U with a Huawei EC 306 modem. Internet provider – Intertelecom (you may have a different modem and provider). We will configure it through the quick setup wizard, according to this scheme:
- Connecting a 3G USB modem to Asus RT-N18U.
- Login to the router settings.
- Changing the admin password to enter settings. Protecting your router control panel.
- Setting up a 3G modem on an Asus router.
- Setting up a Wi-Fi network and setting a password.
How to connect a 3G USB modem to an Asus router?
If the router is new, just from the store, then take it out of the box and connect the antennas (if they exist and are removable), then connect the power adapter and plug it into a power outlet. Connect your 3G modem to the router's USB connector:

If the router has several USB connectors, such as on my Asus RT-N18U, then the modem can be connected to any connector. But, as a rule, one of the USB version 3.0 (it's blue). I recommend leaving it for connecting flash drives or hard drives. And connect the modem to a regular USB 2.0. By the way, on the RT-N18U the USB connector on the rear panel is located very close to the power plug. The modem connects, but the antenna cannot be connected. In the photo above you can see that the antenna connector on the modem is located exactly opposite the power plug. I connect the modem through a small extension cord. So as not to occupy USB 3.0, which is located in front.
But you can connect it like this:

It doesn't matter. The main thing is to connect the modem to the router and turn on the power to the router. And you can move on to configuration.
Setting up a 3G modem on an Asus router (RT-N18U)
We will configure it using the Quick Setup Wizard. In a few steps, it allows you to set all the necessary settings: change the admin password (to protect settings), set up the Internet via a 3G modem, and set up a Wi-Fi network (set username and password). Very comfortably. I checked everything, everything works.
To configure, we need to go to the control panel of the router. To do this, you first need to connect to our Asus router. You can connect via a network cable (which comes included), and via Wi-Fi network. I set it up via Wi-Fi. Immediately after turning on the router, it will begin broadcasting an open network with the name "Asus".

Just connect to this network (you can even configure it from a tablet or phone), open any browser, and type the address in the address bar 192.168.1.1 . Let's go through it. If something doesn’t work out, you can look. The Quick Setup Wizard will open.

To get started, click on the button Go.
If something goes wrong for you: the settings do not open, or the setup wizard does not open, then do it. You need to press the RESET button for 10 seconds. Perhaps someone has already tried to configure the router. And old settings can hinder us. Reset and go to settings again.
The router will immediately prompt us to change the password that will be used to enter the settings. Your router settings must be protected. Therefore, create and enter a password twice. Try not to forget it, or write it down somewhere. Click the button Further.

Select the operating mode of the Asus router. The mode will be immediately selected there: Wireless router. We leave him. Click Further.

So, now is the most important thing. Setting up a USB modem. Opposite the point Location, select your country. Against ISP, select your Internet provider from the list. All settings will be registered automatically. Don't change anything. And at point USB adapter (I have a modem), you can select your modem model. For some reason my Huawei EC 306 is not there. I put Auto, and everything works. We put everything out and check it (these are important settings) and press Further.

Well, the last settings are the name of the Wi-Fi network and setting a password for Wi-Fi. Come up with it and enter it in the field Network name (SSID) some name for your Wi-Fi. And in the field Network key, you need to set a password that will be used to connect to your network. I also immediately advise you to write this password down somewhere. Press the button Apply.

The router will show you all the information we have set. Press the button Ready.

The router will save all settings and reboot.
A new Wi-Fi network will appear (with the name you specified). Connect to your network using the password you set during the setup process.
The router will connect to the Internet via a 3G modem (as a rule, after rebooting you need to wait a little, and Internet access will appear), and will distribute it. The router is already fully configured. The Wi-Fi network is also configured.
Additional settings for a USB modem and manual configuration of an Internet connection via 3G
If you plan to use your router only with a 3G modem (do not connect cable internet), then I would also advise disabling the secondary WAN, and using USB as the main one. We need to go to the settings again at 192.168.1.1 . A request for login and password will already appear. We changed this password during the setup process, please indicate it (the password is not for the Wi-Fi network, but for entering the settings).

Next, on the left, select the item Internet, and open the tab Dual WAN. Opposite the point Enable Dual WAN set the switch to position OFF. On the contrary Primary WAN select USB. Click on the button Apply. The router will reboot.

If you go to the settings again, on the main page you can see information about the modem and Internet connection via 3G.

To change the 3G provider settings on the Asus router, you need to go to the tab USB application - 3G/4G.

That's all the information on setting up a connection via a USB modem or phone (Android) on Asus routers. If necessary, configure the Wi-Fi network itself (change name or password), you can directly on the main page with settings. There is a "System Status" window there. Well, or on the tab Wireless network.
What to do if the Asus router does not see the USB modem, or there is no connection to the Internet via 3G?
Very often there is a problem when it is simply impossible to configure the router to work with a USB 3G modem. Either the router doesn’t see the modem at all, or it refuses to connect to the Internet. There is no connection to the provider. Wireless Internet, I will enter 3G, is not as stable as a regular cable connection. Therefore, sometimes you need to tinker with the settings.
If you have configured everything according to the instructions, but there is no connection to the Internet, then do this:
- You need to make sure that the router supports your modem. I provided a link to a page with compatible modems at the beginning of this article.
- We check the settings of the Internet provider. You may have chosen the wrong provider. You can try to configure everything (name and password) manually. I showed you how to do this above. USB application tab - 3G/4G.
- You need to update your router's firmware to the latest version. This can be done separately. However, you will need an Internet connection.
- In such situations, the router is not always to blame. There may be a problem with the modem or ISP. Make sure that the Internet is paid for, and when you connect the modem to the computer, everything works.
- Also, the problem may be that the modem cannot receive a signal. Your carrier's coverage is missing or very poor. In this case, I advise you to check the operation of the modem on your computer again, or.
For faster Internet speed, I advise you to install an antenna for the modem. If you have a bad signal. You can view . If your signal is really not very strong, then installing an antenna and configuring it correctly will give a very good increase in Internet speed. Verified :) Setting everything up is very simple. We connect the modem to the computer using the AxesstelPst EvDO BSNL 1.67 program (link to instructions above) We configure the modem for maximum reception and connect it back to the Asus router.