Display the Home button on the iPhone and iPad screen. What is Assistive Touch and how to use it? How to remove the navigation button from the iPhone screen
The Home button on Apple tablets and phones has two forms: physical and virtual. If the owner cannot have any influence on the mechanical element, then the graphic analogue can be displayed and removed from the screen at any time.
Simple and understandable step-by-step instructions in our article will allow you to quickly remove the home button from the iPhone screen, and she will also teach you how to activate the “Home” function again.
To remove the virtual “Home” button, you will need to go to settings and follow a simple path:
- “Settings”/“Settings”.
- "Basic"/"General".
- Deactivating the AssistiveTouch function.
The fact that the Home button is disabled will be indicated by a change in color indication: green ON will turn to gray OFF.
Need remove home button Often rare, users of Apple products, on the contrary, strive to display virtual control on the screen.
Many people consider it necessary to activate the graphical option “Home” as a preventive measure. After all, the less often you press the standard version of the Home button, the longer the iPhone lives without repairing or replacing the physical button.
Displaying the multitasking button on the iPhone screen is as easy as removing it.
The sequence is identical and differs only in the last point:
- “Settings”/“Settings”.
- "Basic"/"General".
- "Universal access"/"Accessibility".
- Activating the AssistiveTouch function.
Accordingly, the button changes color from gray to green, indicating that virtual control is displayed on the iPhone screen.
You can make returning the home button even easier. Triple clicking on the built-in control activates a special menu.
It also has an AssistiveTouch function, which takes the user to the desired settings location and allows you to turn on Home with a single click.
Additional functions of the Home button
“Home” is a multitasking key. Essentially, this is another menu for quickly managing iPhone services.
Everyone knows its standard use cases:
- Single press – return to the main menu.
- Double tap to open multitasking.
- Triple click – call up additional features.
Additional features can also be turned on or off in “Universal Access” in the settings by checking the desired options in “Keyboard Shortcuts”.
What can you install or disable in this miniature special menu?
The functions are as follows:
- "Color Inversion". Changing all screen shades to the opposite ones, which is convenient for adapting the device for reading at night.
- "Increase". An excellent magnifier for visually impaired users, as well as a convenient way to view small pictures on the Internet.
- "AssistiveTouch". Quickly call the “home” button and instantly disable it.
- "SwitchControl". Adapting iPhone controls to suit the limited capabilities of some users. With the correct settings of the “switches”, you can adjust the operation of phone services with head movements, a single touch, or via Bluetooth.
- "Shades of Gray". Switching the product to black and white mode to save energy or just because.
Any of the named functions can be enabled or disabled, but adding new tasks to this list will not work. And why? iPhones are the ideal consumer technology that gives the most to everyone.
The only thing the owner needs to do is master all the capabilities of an ultra-modern smartphone and use them 100%.
From the article you will learn
Unfortunately, Apple devices also break, no matter what boards and cases they are equipped with. This can happen either due to defects or due to the negligence of the user himself. But due to the fact that the “Home” button often appears among breakdowns, users immediately go to the Internet to understand how to continue working with the device? After all, Home is the main, and, in fact, the only control button, thanks to which navigation, closing applications, switching between them and many other operations are carried out.
But Apple, one might say, thought about this point in advance and introduced Assistive Touch technology. It is worth noting that it was introduced as an alternative option for people with disabilities, but has become widely used among users whose Home button does not work correctly.
When is Assistive Touch used?
This list highlights the main reasons why users enable this technology on their smartphone:
- People with disabilities. The technology was originally designed for them;
- Users whose Home button is broken. Even if you are already planning to take your device to a service center, you want to make a backup copy, save important data, and inform your family and friends that you will not be able to communicate with them for some time. That is why you can turn on this technology and perform all actions even with a broken Home button;
- Out of interest. Often people try to display the Home button just to try it out, and many of them simply get used to it because it is really convenient.
In general, whatever the reasons, the principle of activating and working with this option is the same.
How to put the Home button on the screen?
There is another way to enable this mode using Siri. All you have to do is say “Hey Siri” for the voice assistant to appear, and then say the phrase “Activate Assistive Touch”.


This technology is available on devices with iOS 5 and higher; accordingly, it is supported by devices from the iPhone 3GS and subsequent generations.
How to use Assistive Touch technology?
We have displayed the button on the screen, but how to use it, you ask? Press the virtual button once with your finger to display the control menu. By default, there are 6 icons for different actions, namely:
- Notifications – goes to the list of notifications that are displayed on your smartphone (a standard call is made by swiping down);
- User – all control buttons and gestures are collected here, and the ability to create your own gestures is also provided;
- Siri – activation of the voice assistant for further work with it;
- Device – here are the control buttons for your smartphone. For example, you can change the volume, lock the screen, mute the sound. There is also a separate “More” tab, which provides a huge number of possibilities;
- Command centre– call the control point with one touch (a standard call is made by swiping up);
- Home – simulates physically pressing the Home button. That is, by pressing once, you will go to the start menu of your smartphone.


Additional settings for the virtual button
Assistive Touch technology allows for a large number of settings and can be used to simulate different actions. To access these features, go to Settings, click on the General tab, then Accessibility and select Assistive Touch.
Setting up actions
This is a separate item where you can configure your own specific actions for each touch. There are 4 touch options in total:
- Single – click once and get the result;
- Double – you need to quickly click 2 times on the virtual button;
- Long press – press and hold your finger on the button until the result of your actions appears;
- 3D-Touch – press hard to trigger an action associated with 3D-Touch.


For each of the listed touches, you can assign your own specific operations that will be performed. For example, you can bring up a menu with one click, launch a specific application, make purchases with Apple Pay, restart the device, and much more.


You can also set your own duration for a long press. By default, this parameter is 0.75 seconds. Double tapping has a timeout option, which is also time configurable and defaults to 0.30 seconds. Both parameters, despite having their own time settings, are deactivated.
Another important setting item is the top-level menu. This is exactly the list of icons that appears when you press a virtual key once. By default, in iOS 12 there are 6 icons here, but their number can be increased to 8, as a result of which they will be arranged in a square. You can reduce it down to 1 icon. If you accidentally configured the icons not the way you wanted, just click the “Reset” button, and a starting set of 6 icons will appear on the screen.

Here you can also customize the appearance of the button, or rather, its contrast. In the “Opacity at rest” item, you can choose what percentage the button will be opaque at rest. By default this parameter is 40%.


How to disable the Home button from the screen?
If you need to remove the virtual Home button on your device, just use one of the following methods:
- Go to “Settings”, go to “General” and find the “Accessibility” item. Here, click on Assistive Touch and turn it off;
- Call your voice assistant Siri and dictate the phrase “Remove or turn off Assistive Touch.”

Conclusion
This technology has a very wide range of applications, thanks to which you can assign different actions to different types of clicks. Moreover, you can create your own individual gestures, which will be recognized by the device and provide you with even more control options. At any time, the specified combinations can be changed in the Assistive Touch control menu or reset to factory settings.
Remember that this option is useful not only in case of breakdown, but also when you work the device extensively. But for those who are accustomed to physically pressing the Home button, this option is not entirely suitable, since it does not create the same tactile sensations.
On iPhones there is only one physical navigation button - the “ Home”, which is located under the screen in the middle. This key allows you to minimize applications, call a virtual assistant and perform a lot of other necessary actions. Control your gadget without the " button" Home"becomes almost unrealistic - but what to do if it fails?
Fortunately, Apple developers have provided the ability to display the “ Home"on the iPhone screen. You will learn how to do this by reading this article.
Display the button " Home"The Assistive Touch function allows you to access the iPhone screen. This function is intended for people with disabilities, but it is more often used by owners of gadgets with faulty physical keys.
The Assistive Touch function is especially popular among Chinese users - in the Middle Kingdom, almost half of iPhones are controlled “from the screen”. Practical Chinese claim that this method of control is not only more convenient, but also prevents wear and tear on the physical buttons.
How to set up Assistive Touch? All you need to do is follow a few steps:
Step 1. Go to " Settings" and follow the path " Basic» — « Universal access».
Step 2. In chapter " Universal access» find the block « Interaction" It will have a subsection “ Assistive Touch" - go into it.

Step 3. Toggle the " Assistive Touch» to active position.
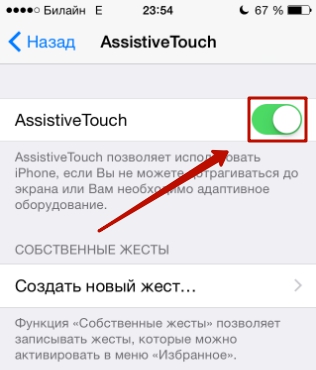
A translucent square with a white circle inside will appear on the screen - the menu launch button.

This means that the function " Assistive Touch"is activated and you can control the gadget without using physical keys.
“Assistive Touch” can be enabled on any Apple device with iOS version higher than 5.0.
How to use Assistive Touch?
First of all, you need to place the function menu launch button in a convenient place. You can move it along the screen frames by holding it with your finger. Placing the key in the center of the screen will not work.
Once you have decided on the location of the button, click on it. You will see a menu like this:

At the bottom of the menu there is a virtual button “ Home» . The functionality of the virtual button is 100% identical to the functionality of the physical one - in particular, by long pressing it you can launch Siri.
In the main menu " Assistive Touch» there are other options:
- Notification Center– allows you to call up the notification screen. The traditional way to bring up this screen is to swipe from top to bottom.
- Voice control- another way to “wake up” Siri.
- Command centre– makes it possible to display a menu for quick control of some of the functions. Pressing this key actually replaces the bottom-up swipe.
- Favorites. Through " Favorites» You can activate gestures that the user has created independently. To start creating a new gesture, go to “ Favorites" and click on any of the squares with the sign " + " inside.

Also in the main menu " Assistive Touch"there is a button" Apparatus" Clicking on it will take you to a submenu where you will find on-screen keys that allow you to perform actions such as locking/rotating the screen and changing the device volume.

Through " Assistive Touch"You can even take a photo of the iPhone screen - to do this, go to the function menu along the path " Apparatus» — « More" and click on the button " Snapshot screen" It is worth photographing only static images in this way, because the screen element responds with a significant delay.
On devices with iOS 9, the main menu “Assistive Touch” can be customized. In particular, users can increase the number of icons in the main menu to 8 pieces.
How to remove the Home button from the iPhone screen?
Deactivating the function " Assistive Touch" is performed in the same way as activation. You just need to follow the path on your iPhone " Settings» — « Basic» — « Universal access» — « Assistive Touch" and switch the toggle switch of the same name to the inactive position.
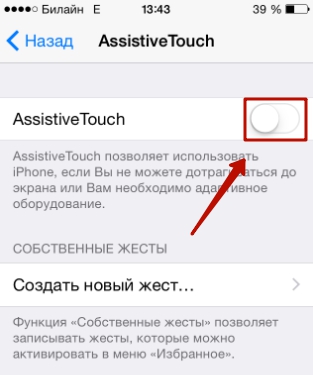
The square with a white circle inside will disappear from the screen.
How do I set up quick access to Assistive Touch?
You can adjust your iPhone so that to start " Assistive Touch“I didn’t have to go through the settings every time. Here's how it's done:
Step 1. Go to the section " Universal access» in the main settings of the gadget and scroll the screen to the very end. At the bottom you will see a subsection “ Keyboard shortcut».

Proceed into it.
Step 2. In the subsection " Keyboard shortcut"Tick the box next to " AssistiveTouch».

After this, you will be able to call the menu launch button " Assistive Touch» by triple pressing the physical key « Home” and hide it in the same way.
Conclusion
At least the virtual button " Assistive Touch" and can completely replace the physical button " Home“, this does not mean that you can delay repairing the device. If the gadget is under warranty, the user should go to the service center immediately - otherwise he risks completely saying goodbye to the hope of having the defect fixed for free.
Modern phones have many features that can make using the device more comfortable. The developers are improving the interface, finalizing the firmware, and making adjustments to the system shell. On iPhones, many users are accustomed to using the interactive Home button located on the display. However, some people don’t like this addition, so the question arises of how to remove the Home button from the iPhone screen. Read on for detailed instructions.
The interactive Home element is used for a variety of purposes. It allows you to lock the phone screen, exit applications, and launch a voice assistant. At the factory setting, the Home button is not displayed. Users independently activate the function through the smartphone settings.
The AssistiveTouch service, installed by default on every Apple phone and tablet, is responsible for displaying the element. When you turn on the mode, a white circle appears on the screen, placed in a black square frame. The button can be placed anywhere on the display, the main thing is that it is convenient for the user.
How to remove the Home button from the iPhone screen
Disabling the on-screen button is not difficult, but it is better to use step-by-step instructions:
- First, launch the application with the phone settings.
- Next, open the “Basic” tab.
- Here we go to the “Universal Access” section.
- Now find the line “AssistiveTouch” and click on it.
- On the page, move the slider to the left opposite the desired item.
Following this guide will allow you to remove the Home button from the iPhone display. Finally, it is recommended to restart your smartphone. If you need to return the interactive element, repeat the instructions.
Conclusion
Thus, anyone, even an untrained user, can remove the “Home” button from the iPhone screen. It is important to follow the instructions correctly and not skip any points. Write in the comments whether you managed to remove the button using these instructions, and also ask your questions in the comments.
These instructions will help you replace the home button on your iPhone 5s yourself.
Note that Touch ID can only work with the factory-installed button. If you replace the home button yourself, you will not be able to unlock your iPhone using your fingerprint. Only a replacement at an official Apple service center can retain Touch ID functionality. .
This instruction is a translation of the article: https://www.ifixit.com/Guide/iPhone+5s+Home+Button+Replacement/24983.
We also have instructions on how if you're interested.
Warning
This article is not a guide to action! All responsibility for collecting and disassembling your device lies with you.
Many manufacturers do not bear warranty obligations if the device has been disassembled by the user. If you do not want to lose the warranty for your device, check the terms of the warranty in the documentation or with the device manufacturer.
Tools used
|
If your iPhone screen is broken, then first seal it with tape so as not to damage yourself and the phone with small shards of glass.

Apply several strips of tape until you cover the entire screen area. First of all, this will protect you and the phone from small fragments, and secondly, it will help maintain the integrity of the screen when we take it out of the case.

I highly recommend using safety glasses and gloves. Getting glass shards out of your eye is a very unpleasant task :(
 1
1
Turn off your phone before starting work.
Next, remove the two 3.9mm Pentalobe screws that flank the Lightning connector.

Use a suction cup to remove the screen module. Place the suction cup on the screen near the home button and press down until the suction cup sticks and holds well.

The display module is held in the case with latches and is also connected to the motherboard by several cables. One cable is located under the home button, the rest are at the top of the iPhone. Your task is to open the iPhone just enough so that you can disconnect the cable under the home button.

Don't rush, this procedure may take some time. The iPhone 5S display is fixed quite firmly in the body. Do not try to open the phone completely at once; do not forget about the cable.

As soon as the display is held only by the cables, you can remove the suction cup, to do this, pull the tab on the suction cup, or, if there is none, lift one edge of the suction cup with your fingernail.

We're filming...

Now we lift the display module from the side of the “home” button just enough so that you can disconnect the cable.
Do not raise the screen too high, you may damage the cable or connector. The cable must not be stretched.

Use tweezers to remove the bracket from the connector.

During assembly, install the bracket correctly. The side with the small tooth should be facing down the device, and the side with the two slots should be facing the battery.

Use tweezers to disconnect the cable connector from the connector on the motherboard.

Make sure that the connector on the cable is actually disconnected from the connector on the motherboard. The connector on the motherboard is glued and can be pulled off the motherboard if you are not very careful, but the connector itself will still be connected to the connector on the cable.

After the home button cable is disconnected, open the phone 90° from the home button side as if there was a hinge at the top of the phone.

During the next few steps, keep the screen raised 90° as shown in the picture.

Unscrew the screws marked with circles:
- 1.7mm Phillips #000;
- 1.2mm Phillips #000;
- 1.3mm Phillips #000;
- 1.7mm Phillips #000 head screw. This screw is not magnetized with a screwdriver. Don't lose it.
It is very important not to mix up the screws during assembly. If you use a 1.3mm or 1.7mm screw instead of a 1.2mm one, you can cause serious damage to the motherboard and brick the iPhone.
Do not overtighten the screws. If the screw does not go easily, then you may have made a mistake, do not use force.

Remove the protective screen.

Using a spatula, disconnect the connectors of the selfie camera and sensor cables.


Keep the screen raised at 90°. Now disconnect the cable from the display.

During assembly, the display connector may not snap fully into place and you may see white lines on the screen when the iPhone boots up. If this happens, unplug the display connector and plug it back in, then restart your iPhone. The best way to reboot is to disconnect the battery for a few seconds.

Now disconnect the touch screen connector.


Now you can remove the screen.

On the back of the screen, remove the single #000 Phillips head screw that holds the home button in place.

The unscrewed screw is fastened to the cable with a clasp with a spring contact. During assembly, make sure that the contact spring is installed, as before, between the screw and the screen.

Bend the train.


Remove two 1.4mm Phillips #000 head screws.

Remove the bracket that holds the home button.

Place the spatula under the cable coming from the home button. The cable is slightly glued to the display module.

Gently move the spatula left and right to unstick the train.
Do not remove the button yet; it is still connected to the display module.

If necessary, remove some of the tape you initially placed on the outside of the display.
Gently press the top left corner of the button from the outside.

Do not try to squeeze out the entire button at once; your task is to release only one corner, and then insert a “spatula” there and pry it off.
The membrane around the button is very thin, if you think it is about to break, heat it a little with a hairdryer and try again.

Remove the button from the display module by carefully prying it up and bending it using a spatula.

Like this…

The button has been removed. You may need to transfer the rubber boot from your old button to the new one.

Using tweezers, carefully peel the rubber band off the button. The elastic is very thin and very easy to tear. If you feel like you might tear it, heat the button with a hairdryer and try again.