Transferring windows 10 to another computer. How to transfer an operating system to another hard drive. Deleting an old system entry
In order to transfer any Windows operating system to another computer, you will need a license key. You can buy a key to activate a licensed copy of Windows on the official website, this is as easy as pie. It’s worth mentioning right away that a very large number of users use . Which leads to not very pleasant consequences.
Let's start with the fact that a pirated system cannot be updated, and therefore if you downloaded a pirated copy and threw it onto a drive and soon tried to transfer it to another device, you do not know what to expect from it. Since you have no idea what the “pirates” did with this system, what they removed and what they added. It often happens that pirated copies cannot be transferred to other devices. Despite the fact that there are a lot of problems and fuss with them, people continue to download them to their computers.


In addition to the problems that these types of files bring with them, it very often happens that on many of these suspicious sites, along with the operating program, they can download some kind of virus to your computer, be it an adware virus or something even worse and much more. -something else. And despite all this, every self-respecting computer geek in your city will have a disk with a hacked operating system. If you often use the services of such people, then you definitely know about this. And by the way, if the pirated copy fails the authenticity test when downloaded, then you will encounter problems such as these:


Now let's move on to the main question: how can we transfer Windows 10? to another computer, now let's move on to the original copy of the operating system. Let's say you've already bought it for yourself. So, from the very beginning, a wide range of possibilities is already open to you. Let's start with the fact that no matter what version of the system you buy for yourself, it can always be updated to the newest one.
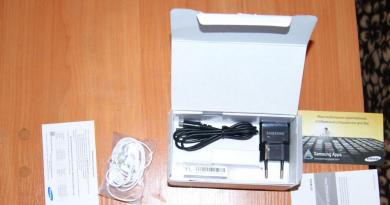
That is, you can purchase a license code only once and forever. The main thing is to keep it with you and not lose it, or you will have to buy another number. By the way, it looks exactly like this:


This was the preparatory information about our topic, now let's start transferring the license number from one device to another, let's go!
Understanding the key
The most obvious thing is that first you need a Windows key. You can have it in two states: Activated and not activated. If you just bought the product and did nothing else with it, then you can easily transfer it to the unit to which you want to transfer the operating system and install it immediately. But most often it happens that it is already activated, since no one is holding a couple of extra keys at hand, costing from a couple of thousand rubles
In order to use such a key, you first need to unlink it from your old computer before transferring it to a new one. The developers made it so that it only works in one place so that users cannot copy and sell this password , it's simple. To unlink the cipher from the operating system, find the command line on the block (don’t forget to run it as an administrator) and enter this command into it: slmgr.vbs /upk.


If nothing works out for you, check if you launched the line correctly, if so, then try the following command, you should not have problems here: slmgr.vbs -upk .
Untie the key
After this, the computer will ask you for permission to unlink the number from the device. The last preparatory stage is that you must download exactly the windows on which you activated the number (then update it on the new hardware, this will happen later). Then we recommend downloading the correct msdn image that suits your machine, this is necessary so that all processes go smoothly on the new device.
But this is only a recommendation, so you don’t have to listen to us and hope for luck, maybe you’ll get lucky, but it’s better for you to play it safe. After you deactivated the program, it became unsuitable for functioning, so you must revive it again, so to speak. On this device, find the activation settings and try to enter your key.


Since it doesn't work, you will be denied surgery, but this happens to everyone, don't worry. After a system failure, go to Start, find the “Run” tab and type the following command into it: slui.exe 4.
With this set of characters, you will let your robot assistant know that you need help. In response, the machine will provide you with a list of countries, select your country there and then select the method of activating the program; the fastest way is to activate the software by phone. A robot will call you and ask you to enter a special key, exactly that key of 9 blocks. And after that, soon you will switch places and the robot will dictate your code to you, it will repeat all the blocks several times, during which you must have time to write down the code for yourself, if it doesn’t work out, ask for permission again.
After taking dictation, you have a new, updated process that you can reactivate once. After this, prepare the new device for activation. This is what the registry editor looks like:


Transferring the code to a new device
Already on the new personal computer, find the registry editor, go to REGEDIT. Then, being in this tab, edit the parameter called MediaBootInstall, change the number one to the number zero, using this address: HKEY_LOCAL_MACHINE/Software/Microsoft/Windows/CurrentVersion/ Setup/OOBE/
Then go to CMD. And don’t forget, we do all this on behalf of the administrator, otherwise there will be no point! In the window that appears, enter the characters slmgr /rearm . After successfully applying the command, reboot the machine.
Immediately after the reboot, go back to the command menu and enter these characters:
slmgr -ipk XXXXX-XXXXX-XXXXX-XXXXX-XXXXX XXXXX…
If anything, the crosses are your old Windows code, enter it exactly.
After entering it, we take the final steps and restart the computer. again! After the reboot, if you did everything correctly, we move on to the sweetest moment - enjoying the activation of the file on the new device.


After this, it will function exactly the same as on the old version. Well, after that you can choose which version you need to update to, in our case to 10, if you have version 7-8, then you will have to wait a long time until the end of the updates, if you are a true connoisseur of Windows XP and started updating right from him, then you can forget about the computer for at least a day.
Now, soon the transferred key will begin to work properly, without any problems, the main thing is to carefully follow the instructions.


After all the updates, make sure once again that the encryption is activated, just in case. Also, we must take you into account - be sure to uninstall Windows and set it to ten again. If you don’t know why, then it is necessary so that the computer works faster and more productively. Since the version updated from ten to zero works much slower and worse than the freshly downloaded ten.
Completion
Before concluding, let’s move on to some of the nuances of the pirated version, since most people will continue to install them after reading this article. Their essence is that, literally speaking, a pirated copy will work for you forever, will not notify you about such little things as updates and so on. Therefore, pirates usually sit on older versions, waiting for a hacked, high-quality pirated copy to come out, That’s why they are not so strong in the new design and functions of the device, since they were preserved for a long time on old versions. And all this is done in order not to waste money.
Now you have learned the best and most reliable way to transfer the number of Windows Ten and other operating systems from one device to another. But still, if you don’t understand something, we suggest you familiarize yourself with these video lessons:
Key activation:
Thank you for your attention.
SSD drives are becoming more and more popular. This is due to an increase in their reliability, a decrease in cost and an improvement in the characteristics that they possess. Therefore, it is great for installing an operating system. But in order not to reinstall it again, you can transfer Windows 10 from HDD to SSD, saving all the data.
Why transfer?
If you decide to use an SSD as a drive to store data (photos, video or audio files), it's a moot point since these devices have a limited overwrite limit. Active use will very quickly destroy it, unlike the HDD, which has been serving me for over 10 years and is still in excellent condition. But it has a SATA II connection interface, a small buffer size and low response time. Therefore, it was decided to purchase a solid-state drive to transfer Windows 10 to it.
SSD drives are great for OS installation because they have the following advantages:
- high read/write speed;
- silent operation;
- low level of heat generation.
In addition, Windows is “static files” that do not require constant rewriting, but only reading. Therefore, if you install the OS on a solid-state drive, this will speed up its operation several times and at the same time the resource of the device itself will be used very slowly.
Another reason why I decided to install an SSD in my PC was participation in the insider program.
Microsoft releases a new build for Fast Ring approximately once a week. It took about 1-1.5 hours to install it on an old HDD. If we add to this the Windows startup time - about 1.5-2 minutes, it becomes clear that the solution has long been obvious.
SSD selection
Details on how to choose an SSD disk for a computer are described in the article “”. In my case, three parameters were priority:
- number of rewrite cycles before failure;
- memory type;
- manufacturer.
As for capacity, if you are going to use the SSD only to install Windows 10, choose models from 120 GB and larger.
Why shouldn't you buy 64 GB drives?
There are several reasons.
- For stable and normal operation of the SSD disk, it must have up to 20% free space of the total volume. If you use a 64 GB model (in fact, its volume will be slightly smaller - 58-60 GB), only 40-45 GB will be available for active use. Microsoft's recommendations for free disk space for Windows 10 are 16 GB for 32-bit and 20 GB for 64-bit OS. And this is already half of the specified space.
- After installing a new build or updating Windows 10, a copy of the old OS remains on the system disk, which is used during recovery. This is an additional 15-20 GB.
- In addition to the browser and audio and video players, the average user uses various programs and utilities. Installing them also requires quite a lot of space (for me it’s about 8 GB). For a gamer or person involved in video processing, you will need even more free space on the system disk.
Therefore, in modern conditions, the minimum size of the SSD drive that is used in the device to install the OS is 120 GB.
Connection and setup
The transfer process will be shown using a solid state drive as an example. 
- Turn off the computer → disconnect it from the network by unplugging the plug from the socket → press and hold the PC power button for 4 seconds (this will completely cut off the power to the device).
- Open the case and install the SSD. New cases have bays for installing SSDs in a 2.5-inch form factor. Older models do not have them, so you can use a special adapter frame.

- Connect power and SATA cable to the SSD → close the case.
- Turn on your computer → enter BIOS → set the AHCI SSD drive mode → save changes and launch Windows 10.

- RMB on the Start menu → Disk Management.

Important! The table at the bottom of the window will display the connected SSD drive. It will be marked in black and labeled “Not distributed.”

- RMB on SSD → Create simple volume → Next.

- Set the maximum simple volume size → Next.

- Select the volume letter → Next.

- Set the radio button to “Format this volume as follows” → leave all default values → Next → Finish.

After this, Explorer will display a new drive under the letter that you set in the settings.
Transfer Windows 10 to SSD
To transfer Windows 10 to a solid-state drive, we used a program that has a wide range of functions. The choice fell on it because the SSD included a key for free activation. However, the program is paid, so it is not suitable for everyone.
There are other programs (paid and free) that can be used to transfer (clone/copy) a Windows partition to another drive:
- Seagate DiscWizard (works if the device has a Seagate drive installed);
- Samsung Data Migration (designed to work with Samsung solid-state drives);
- Macrium Reflect is a free program for cloning an entire disk or its individual parts, which has an English interface;
- Paragon Drive Copy is a paid program that has wide functionality.
The interface of all programs is different, but the operating algorithm is the same: they transfer data from one disk to another while maintaining all settings. There is no need to study instructions for their operation - everything is done so that the user intuitively understands what he is doing.
- Launch Acronis True Image → Tools section → Clone disk.

- Select the cloning mode: automatic or manual.
Good to know! In order not to worry that you will do something wrong, select the “automatic” mode and the program itself will transfer all the data from one disk to another. In this case, the SSD drive must be no less than the amount of data stored on the HDD. To configure transfer settings, select the "manual" setting.
I chose the "manual" cloning mode to transfer only the OS.

- Specify the source disk from which data will be cloned.

- Specify the drive to transfer information to.

- Exclude files that do not need to be cloned to the SSD. To transfer only the OS disk, check the boxes for files on other disks to exclude.

Important! The process of calculating information can take a long time (about 15-20 minutes).
- Change the disk structure if necessary. In my case, it was left unchanged.

- Review all source data → Proceed.

After completing the preliminary operations, the program will ask you to restart your computer. Then, instead of starting the OS, the Acronis True Image program window will open and display the cloning process. Wait until the operation is completed and then the computer turns off.
Selecting the primary drive in BIOS

Setting up the OS after the transfer
More details on how to configure an SSD disk after installation on a computer are described in the article “”. In general, you need to check the following parameters:
- whether the TRIM function is enabled;
- Is disk defragmentation disabled (it is not needed due to the way solid-state drives operate);
- Is file indexing disabled?
As for the hibernation file, many advise disabling it in order to reduce the amount of information written to the SSD drive to extend its “life.” I didn’t turn it off because I often use this mode at work. But you can do as you see fit.
Please note that due to the settings that I specified during cloning, disks will be created on the solid-state drive, as was the case on the HDD. You can merge them in the Disk Management utility.
- RMB on the Start menu → Disk Management → select SSD drive.
- RMB on an empty disk on a solid-state drive → Format.

- RMB on this disk → Delete volume → Yes.

- RMB on this disk → Delete partition → Yes.

Delete Windows 10 files located on the HDD by formatting the drive. This will eliminate confusion in the future and free up space for storing files.
Results
| Parameter | Before | After |
|---|---|---|
| Windows 10 boot time | 1.5-2 minutes | 17-20 seconds |
| Windows 10 update time | 1-1.5 hours | 20-30 minutes |
| Program/application response time | low (3-15 seconds) | high (1-5 seconds) |
| Data copying speed (within a separate disk) | 50 Mb/s | 300 Mb/s |
In addition, in the Winaero WEI tool, which calculates OS performance (similar to how the system score is determined in Windows 7), the “Primary Hard Drive” indicator increased from 5.6 to 7.95. (you can find out how else to determine the performance of the OS in the article “Determining and increasing the performance of a Windows 10 computer. “Pleasant” surprises
The warranty period is 3 years with a total number of written bytes of 113 TB. The volume is quite large. BUT!
Every day, much more information is written to disk than it might seem. This is service information, wear leveling algorithms. Thanks to them, the same SSD memory blocks are not constantly rewritten. Periodically, unused (or rarely used) files are moved to areas of the drive that are actively used. The free space that appears after redistribution is then used to record new information. This is a cyclical process that happens constantly.
As a result, in the worst case, 1 GB of useful data accounts for 1.5 GB of recorded information. Plus data cache in browsers and other information. As a result, on average, about 15 GB of information is recorded on my SSD every day. But even with such indicators, the resource of the solid-state drive will last approximately 15-18 years.
For people who actively write/erase data, this figure will be significantly lower. But even in this case, the relevance of the purchased SSD drive model will disappear faster than it fails. So stop believing the myth that SSDs are unreliable! In modern conditions, they are the best choice for installing Windows 10.
Why Windows 10
Because 2017 is right around the corner, the very middle, and progress does not stand still. No matter how those affected by Vista scold Windows, the system has made great progress along with the rest of humanity, and the top ten is very good for work and everything else. If there are clear reasons to install some old versions, please write them in the comments.
Ways to transfer Windows 10
- Using special programs like Paragon Migrate OS to SSD (paid) or EaseUS Todo Backup Free (free).
- A clean install of Windows on a new drive is personally a better way for me. The installation itself is easy and quick, partitioning the new disk and formatting the old one is right there in the process. A kind of general cleaning in the computer industry.
Clean installation of Windows 10 from a USB drive
I assume that you already have a legal copy of Windows 10 installed, which you are going to transfer to a new SSD drive. And it goes without saying that all your work or family files and folders are already saved to an external hard drive or to the cloud! Making backup copies regularly is generally a good thing.
1. Create Windows 10 installation media.
Connect a USB drive with a capacity of at least 5 GB to your computer - empty or with files that you don’t mind, because the entire contents of the flash drive will be erased.
- Go to the microsoft.com downloads page and download the Installation Media Builder - click the "Download Tool Now" button at the top of the page, save the file, and run it once the download is complete.
- Accept the terms of the agreement.

- Select create installation media.

- View system parameters and change if necessary.

- Select recording to a USB device.

- Information about the selected USB drive.

- We are waiting for the Windows 10 installation files to finish downloading. Depending on the Internet speed, the process may take different times. In my case, it took about 40 minutes before it fully loaded.

- Click “Done” when finished.

2. Installing Windows from a USB drive
- We go into the BIOS settings to set the flash drive as a boot disk. To do this, restart the computer, and when the manufacturer’s logo appears, press the Del key on the right side of the keyboard. We put the USB drive first in the boot queue. The specific type of BIOS depends on the manufacturer, but the meaning is the same.

- Save the settings and reboot again.

- Launch the installation program. We check the parameters, then the “Next” button.

- Click the “Install” button.

- We agree that Microsoft doesn’t owe us anything and all that.

- Select “Custom: Windows installation only.”

- We choose which disk to install the system on. The screenshot shows two completely clean, unallocated disks as an example. The larger one is the old HDD on which the previous Windows system was installed (I just deleted it using the “Delete” command at the bottom of the window). The smaller one in this case is the new SSD. I select it and click “Create”.

- I'm creating partitions for the second disk.

- I select the largest partition from the first disk (Disk 0 in the screenshot), then “Next”.

- We are waiting for the installation program to prepare everything. Then the computer will reboot itself. The whole process may take 10-20 minutes depending on the speed of the USB drive and SSD.

- Setting the region.

- Keyboard layout.

- Additional layout.

- Connect to the network.

- Sign in to your Microsoft account.

- Set a PIN code, if needed.

- Drive if needed.

- Privacy settings. If there is no definite opinion on this matter, just leave it as is.

- Complete installation.

Life after reinstallation
She's beautiful! Windows starts before you have time to pour the tea. 3ds Max installs in 9 minutes, launches in 30 seconds instead of 3 minutes with HDD. Whether such pleasant little things are worth all the fuss - everyone decides for himself.

After the start of the update to Windows 10, many users of the new version of the operating system had questions about the procedure for re-activating the system, for example, in the case of reinstalling the operating system or when changing device components to Windows 10. Soon after the release of the new operating system, it became clear that in the process Upgrading from a legal version 7 or 8.1 to Windows 10, the free license is tied to the computer hardware, and not to a Microsoft account as originally intended. In this case, the system automatically receives the same product key for all updated users.
For those who want to know more

After the start of the update to Windows 10, many users of the new version of the operating system had questions about the procedure for reactivating the system, for example, in the case of reinstalling the operating system or when changing device components to Windows 10.
Soon after the release of the new operating system, it became clear that during the transition of the legal version 7 or 8.1 to Windows 10, the free license was tied to the computer hardware, and not to the Microsoft account as originally intended. In this case, the system automatically receives the same product key for all updated users.
Microsoft does not want to go into details regarding the activation process, so as not to assist pirates, but at the same time it makes the licensing issue unclear.

How activation and licensing works Windows 10
First, a little history: in Windows 7 and 8.1, during initial activation, a unique computer identifier was created, which, together with the product key, was saved in the activation server database. Accordingly, when reinstalling the system and reactivating it, the match between the identifier and the key with which the system was installed was checked. If both of them coincided with what was already in the database, the system was activated.
Free licensing for Windows 10 works differently than in previous versions of Windows. Previously, activation always required a product key. Even modern computers with Windows 8 and 8.1 - as well as new PCs with Windows 10 - have this key baked into the UEFI firmware. When you purchase a new copy of Windows 10—for example, to install it on a computer you've built—you will also be issued a product key.

Those who upgrade to Windows 10 are not given license keys. And it’s impossible to find out your key after the update - it simply doesn’t exist. It's embedded directly in the installer and is automatically entered during the upgrade process, but if you look at it using a specialized tool and then compare it with, for example, the key of your friend who also completed a free upgrade to Windows 10, you will find that they completely identical.
When upgrading from Windows 7 Service Pack 1 or Windows 8.1, the installer registers a unique ID that allows Windows activation servers to identify your PC hardware.
Subsequently, if you reinstall Windows 10 on the same computer, the system will automatically contact the activation servers, which, in turn, making sure that this particular configuration allows the use of a free Windows 10 license, will automatically activate your copy. That is, during a clean installation, you can safely skip all those steps where you need to enter a product key, knowing that after installation the system will be activated automatically.

This means that the product code will be legal if, after reinstallation, all the same components are on the PC as at the time of the update or clean installation.
How can I transfer Windows 10 from HDD to SSD and what will happen to activation?

Replacing an HDD with an SSD alone does not create a new computer. This is true for all versions. Replacing a hard drive with a solid-state drive can significantly improve the comfort of using a computer. This replacement is relevant for both desktops and laptops. In this case, it is not at all necessary to reinstall the operating system
On Windows 7/8. And 10 there are already built-in tools for transferring the system to another drive/computer. You should prepare a drive (flash drive or external HDD) in advance to store the image. You will need to go to the “Control Panel” and open the “Backup and Restore” item. Then select the “Create a system image” item, and then specify the prepared drive. You can, of course, save the image both on an optical disk and on a network disk, but this is not so convenient. After image creation is successfully completed, you must select “Create a system repair disc.” It is from this that you will need to boot when you replace the hard drive with an SSD. To transfer, I advise you to completely disconnect the hard drive on which the OS was located, then, starting from the boot disk, specify the system image. If everything went as it should, you will receive your system, but on a solid-state drive. The procedure is described in detail on the Microsoft website.
Of course, this entire procedure can be performed using third-party programs, such as one of the popular solutions - Acronis True Image and the most convenient, and at the same time very simple Paragon Migrate OS to SSD. It's up to you to decide what to use.
You can also reinstall Windows using the Windows Media Creation Tool. Windows 10 (update) must be activated before reinstalling. Save all necessary files and data to external storage in advance. Next, you just need to install Windows 10 on the hard drive you need, in this case an SSD. During installation, simply skip the request to enter an activation key; your system will activate itself automatically.
Remember that to use the old hard drive for data storage, you must remove the boot partitions from it so that there is no conflict with the new system partition. In this case, it is most convenient to connect the HDD via a USB adapter to an already loaded Windows.
What happens to the license if I change device components?

I am sure that this issue worries the majority of Windows 10 users. Microsoft itself adds fuel to the fire by never explaining exactly how activation based on hardware configuration works. The reason for such silence is not clear to me. All this gives rise to rumors, speculation and mistrust in the new operating system. As far as I know, most likely replacing the hard drive or video card will not cause any problems. It is likely that if you replace only some components, Windows 10 will still be able to automatically activate when installed from scratch on the same computer.
However, Microsoft says in its FAQ that installing a new motherboard (and likely processor) will void your license. That is, the company’s servers will treat the computer as a completely different configuration without the right to a free update.
It should be noted that you can completely install Windows 10 by skipping the license key prompt. However, Windows 10 does not activate automatically. This means you either need to enter a license key or buy Windows 10 from the Store. The purchase offer will appear on your screen over and over again.
I hasten to reassure you and give you advice. There is a way out of this situation. It was suggested by Gabriel Aul, vice president of the Microsoft Windows & Devices group of engineers, on his Twitter account. According to him, if you have a similar situation, you need to contact technical support directly through the interface built into Windows 10, explain the situation, and specialists will activate Windows 10 manually.
Solid state drive technology allows you to significantly speed up the loading of various programs. Therefore, migrating Windows 10 to SSD is a priority for all users.
Benefits of using an SSD
- An SSD drive uses flash memory as a resource for storing information, in contrast to the rotating pancakes of a standard hard drive. Because of this, the loading of the necessary information is reduced by 6–7 times. The mechanism for using SSD Mini Tweaker allows you to further increase the speed of operation, removing unnecessary load from your computer. The device works stably with both large fragments and arrays of small files. The total boot time for Windows 10 is reduced to 10 seconds, which is significantly higher than when using an HDD (1 minute or more).
- To eliminate the consequences of restrictions on the number of rewrite cycles in the architecture of modern computers, a hybrid disk interaction scheme is used. At the same time, important programs, such as the tenth operating system, and the most frequently launched applications are located on the SSD drive. The rest of the library of repeatedly rewritable files is located on the HDD.
- When using an SSD under Windows 10, a separate maintenance functionality is provided. The system does not apply defragmentation to the SSD. Read-ahead techniques are blocked, extending the life of the device. The SSD Mini Tweaker program is suitable for optimizing performance.
Selecting an option to transfer Windows to disk
There are two options for installing Windows 10 on a solid state drive. You can either perform a full installation on disk, or clone the operating system image using a third-party program. In the first case, you need to do the following steps:
- connect the solid-state drive to the motherboard via a connector;
- insert the installation disk with Windows or a bootable USB flash drive into the appropriate media;
- select boot priority from this media in the BIOS;
- install Windows using the installation wizard on the corresponding SSD volume label;
- Set priority startup from the drive in the BIOS.
A much easier way would be to transfer Windows 10 to an SSD using a specialized program. In this case, all system settings will be saved. There will be no need to reconnect or configure anything.
After cloning, it is advisable to run SSD Mini Tweaker for optimal OS performance.
To implement the copying mechanism, you first need to select a program. The following options have worked well:
- Acronis WD Edition is suitable for Western Digital brand drives. The application is free and can be installed from the official website of the disk manufacturer. After installation, you need to go to the “Cloning” section and run the “Disk Cloning Wizard”. The transfer process will begin, after which the target disk will receive bootable status.
- Seagate DW is a complete copy of the previous program, but for Seagate disks.
- Samsung DM allows you to install the OS on a Samsung SSD. Works using the installation wizard. Allows both full and partial data transfer.
- Minitool PW is one of the best solutions for transferring to an SSD. The program is completely free, the copying process is loaded not inside the running OS, but using an image that is written to a flash drive. This avoids various restrictions imposed by Windows.
- Macrium Reflect clones the installed OS, regardless of the brand of the disk. The program settings functionality allows you to create bootable disks and recovery images.
An SSD drive needs to limit the number of rewrite cycles for long-term operation. Therefore, installing Windows 10 on an SSD requires disabling services designed to maintain the hard drive. Such processes include:
- File indexing assigns sequence numbers to files by overwriting. Its functionality is redundant and harms the SSD. Disabling occurs in the “Properties” section of a specific disk.
- The search service creates file numbering. To disable it, you need to turn off Windows Search in the Services section.
- Hibernation creates a disk image when the computer is turned off, writing it to the SSD. To disable it, enter “powercfg -h off” at the command line.
- Prefetch and Superfetch load information about possible future program downloads into memory in advance, trying to predict user actions and speed up their loading. Disabling is done through the registry editor, which is activated by the “regedit” command on the command line. In the window that opens, you need to find the Memory Management section and set these services to “0”.
- Defragmentation organizes recorded clusters, which is only relevant for HDD drives. For SSD, you need to disable it, since it has the same access time to all clusters. Deactivation is carried out by disabling the schedule chart in the "Disk Optimization" window of this service.

You can also add to the above measures the use of the automated SSD Mini Tweaker utility.
It independently stops redundant processes that the user previously selected from the list when loading.