How can you unlock a found iPhone? How to set up mobile Internet on Android: instructions and life hacks Connecting devices - instructions
The Internet is as much of a necessity on a mobile device as it is on a PC. Network modes are different - from the practically unused 2G to 5G, the development of which is just underway. Mobile Internet can be configured or disabled in several ways: it all depends on the capabilities of your gadget and the settings of the network itself.
What is the difference between mobile Internet in networks of different generations?
Many people set the network to automatic mode (2G/3G/4G) and freely travel around cities and regions as if nothing had happened. However, there are differences in speed.
In practice, 2G Internet has already become so slow that it is used “out of hunger,” when there is no 3G/4G coverage, but you still need to work. Today 2G is almost zero speed due to overload of subscribers. GPRS/EDGE packet data does not have priority over services that use the GSM voice channel (calls, SMS, USSD commands like *100# and other services). Many people keep the 2G network turned on only because it consumes less battery power. If you don't care about battery consumption, feel free to force 3G or 4G on. In a good way, it’s time to close the GSM/2G standards - they are no more useful than 3G, and radio resources are spent less efficiently. The speed reserve of a GSM/EDGE base station is only no more than 10 Mbit/s, which is divided between subscribers (each of them shares no more than 200 kbit/s).
3G, unlike 2G, provides real speed from hundreds of kilobits to units of megabits per device - with unlimited traffic on the tariff, almost all the needs of a modern user are solved. The 3G network is available in all cities of the country and in many localities. Data is transmitted constantly, regardless of calls and SMS. The performance reserve of one sector of the “tower” is up to 42 Mbit/s (this speed is divided between subscribers). Higher-speed 3G technologies (84, 168 and 336 Mbit/s for reception and up to 72 Mbit/s for transmission) have been developed - but their mass introduction was canceled in many countries due to the rapid growth in popularity of 4G. MTS, Beeline and MegaFon have very good 3G coverage throughout Russia in cities and towns. Tele2 is actively building a 3G network, which was among the last to receive 3G licenses. The network already exists in many places in the regions where this operator is present.
But 4G network coverage is not available everywhere. Developments of the VoLTE service (IP voice transmission over LTE networks) - essentially an analogue of IP telephony in broadband wired networks - are still just promises from operators, but the 4G network works even faster than 3G - up to 20 Mbit/s You will definitely get it, and with such speed, any problem can be solved on the network. The throughput of one 4G “tower” is 75–300 Mbit/s - but the subscriber gets much lower speed: there is still the same division between devices. The best 4G coverage in Russia today is provided by cellular providers MTS and Beeline. Next are MegaFon and Yota - and Tele2 has the smallest 4G zone.
On the YOTA website, blue indicates 3G, blue indicates 4G, and bright blue indicates planned 4G coverage.
5G development is already underway, and telecom operators are conducting tests, including in Russia. The network will actually provide up to 100 Mbit/s per subscriber (the performance reserve of one base station will be from units of gigabits per second), which will allow the subscriber to refuse the services of city providers or use the latter at facilities where, according to the regulations, the use of any wireless networks is prohibited. The first commercial 5G networks will appear no earlier than 2020.
How to set up cellular internet on Android devices
It is necessary to go through a number of procedures in order for the Internet to work on an Android device.
Connecting or checking service status
Before connecting to the Internet on your smartphone, first of all, make sure that the service for accessing packet data networks is active on your SIM card. Previously, this service was called “GPRS-Internet”, then its further continuation appeared - “3G-Internet”, then it simply became known as “Mobile Internet”. To connect it, USSD blitz commands can be used (for example, for Beeline this is the command *110*181#).
Operators do not require anything special to access the Network via 4G, so the instructions for 3G and 4G are almost the same.
Gadget settings for working with the Internet
To set up cellular Internet, do the following:
- Enter the mobile data settings through the command “Settings” - “More” - “Mobile data”.
 Select the desired function to configure cellular network settings
 - If you live near a border, make sure data roaming is turned off.
- Set up your preferred networks. This step may be useful, for example, if you use the Internet from Tele2 and will soon travel to a region where it is not available in Russia (the Internet from Tele2, according to the latest innovations in the tariffs of this network, works at “home prices” in “ Beeline" throughout Russia). In many other cases, you can skip this step.
 The first in the list should be networks that have home roaming traffic rates
 - Choose 3G or 4G technology. It depends on which ones your smartphone or tablet supports.
 An example of technology selection on an Archos 70b Xenon Color tablet without 4G
 - Configure the entry point (APN) by going to the appropriate item. Typically, the cellular provider sends APN settings and when the SIM card is replaced, the settings are automatically downloaded and switched to the desired APN settings.
 Select APN specifically for Internet access
 - If auto-registration of APN does not occur, select any of the available ones (or create a new APN profile) and enter your settings recommended by the operator in it.
 Selectable APN parameter is editable
 - The main thing is to make sure that your device generally allows the use of cellular data. Give the command “Settings” - “Data transfer”, go to the “Operator” tab (let it be Beeline) and make sure that cellular data is turned on.
 If you do not turn on the top slider, there will be no Internet access
 - If your plan is not completely unlimited, you can set a traffic limit, and when you approach it, the Android system will notify you with a message at the very top line of the screen. When the limit is exhausted, the device itself will suspend access to the network - according to the schedule for which the Android traffic scheduler was configured.
- If your gadget supports two SIM cards, do not forget to set the priority of the SIM card for data transfer on which unlimited is active. Even if there are no other SIM cards in the device, the Android system will let you confirm even this single inserted SIM card.
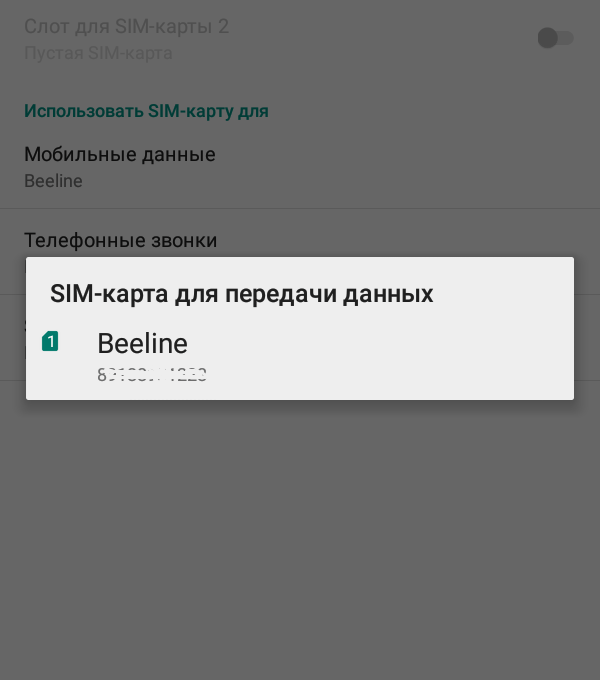 In the window for selecting a SIM card for the Internet, the number and numbers of installed SIM cards are indicated
An abundance of parameters (default servers, port number, name and password for logging into the APN server, proxy settings, etc.) on almost any gadget - based on Android, iOS, Blackberry, Symbian and Windows - is given in case What if one of the operators changes its settings tomorrow and will require entering all these parameters or some of them. Today, Russian operators work with virtually no settings - or require only the APN server to be specified.
APN settings for different operators
Manually entering APN addresses can help if for some reason the auto-installation of the desired APN does not work.
Table: APN entry points for different operators
Internet access without settings
Most operators use access without settings: even if you have incorrect or incomplete connection settings, you will be able to access the network without fear that your tariff will not work. Once upon a time it was extremely important to specify the correct settings specifically for the Internet Access service, and not for WAP. But, since WAP as a service has practically died, access to network resources can be achieved even on an unconfigured gadget. However, operators send their subscribers APN settings for the Internet and for MMS - they are in no hurry to abandon MMS, and the cost of MMS messages has decreased significantly in recent years. The user can only check whether the entry point is selected specifically for the Internet service. In some cases, APN Internet is selected automatically upon command from the operator itself.
When within 3G/4G coverage area, the gadget will automatically switch to the appropriate network - 3G or 4G, if automatic network mode is selected. Both technologies are good enough for high-speed mobile Internet.
Video: setting up the Internet on an Android device
How to disable Internet access on Android
Disabling the Internet can be done in two ways:
- through the operator - blocking the Internet access service on the SIM card (for example, this can be done from the “personal account” on the operator’s website or by calling the subscriber service from another device);
- programmatically - directly on the device itself.
In addition to disabling the “Mobile data” slider in the already familiar data transfer submenu, other methods are also used. Each of them can be used separately from the others - and the result is guaranteed: data transfer will become impossible.
Disabling the Internet in the settings menu
The easiest way to turn off the Internet on Android is to turn off data transfer. You can do this by sliding down the notification shade and clicking on the icon of your SIM card, and then moving the slider to the inactive position.
 Click on your network icon to enter data management mode
 You can also get to the mobile Internet management menu through “Settings”.

Video: how to turn off the Internet on your phone
Operating the device in airplane mode

In airplane mode, you can turn on Wi-Fi or Bluetooth and continue to use the Internet from other devices - the cellular network mode will not turn on and cellular Internet will still not be available until you cancel the “airplane” mode.
Manage packet data using traffic limit
You can lower the total traffic limit below the value to which the gadget’s consumption has reached, in the already familiar mobile data submenu. The Internet on the device will immediately pause.
 If you lower the limit below the traffic, access to the mobile Internet will disappear
 Prohibiting packet data from the Android engineering menu
If access to the Internet is blocked using the engineering menu, communication in the standards of all networks supported in your country is blocked. This will not allow the gadget to find any networks at all - not 2G, 3G or 4G. This is the most sophisticated method for experienced Android users.
- Call the Android engineering menu by typing the command *#*#3646633#*#* using the dialpad of the Phone application.
 As soon as you enter the last character of the command *#*#3646633#*#*, the engineering menu will open
 - Give the command Telephony - Band Mode.
 To disable data transmission, you can turn off frequency bands in a given country
 - Go to the menu for one of the SIM cards.
 In the Band Mode item, select one of the SIM cards from the list if you have several of them
 - Check one 2G, 3G and 4G band that is not supported in your country, press the Set key and close the engineering menu.
 Include bands from other countries, such as the US
 - After restarting, the gadget will not be able to find any of the available networks. To return to normal operation with cellular networks, go back to the same engineering submenu and turn on the previously working 2G/3G/4G frequency bands.
To prevent another person from using the Internet from your SIM card, set up parental controls in Android. This measure does not apply to disabling Internet access through the operator’s subscriber service. You can also set up parental controls through “Settings” - “Users” - “Add user”.
Video: setting up parental mode in Android
Clearing the APN profile on your device
Removing APN settings from the gadget will not help if network access without settings is active on the SIM card. When you insert another SIM card or “plug” the same SIM, the operator will send you its APN settings to your device - and automatically select the APN Internet entry point. This is done for convenience - so that the user can immediately use the mobile Internet. Therefore, deleting APN does not make sense. Use other ways to limit or turn off the Internet on your device.
What to do if mobile Internet does not work on your device
There are many reasons why the mobile Internet does not work on an Android device - both on the subscriber’s side and on the operator’s side. Problems can also be caused by problems with the device itself.
Causes of problems on the subscriber side
Mobile Internet may not work due to some:

In the latter case, double-check the Android settings according to the instructions above or reset the device using the hidden Reset button, after copying important data and removing the memory card from the gadget (if it has one).
Video: what to do if mobile Internet does not work
System causes of network problems on Android
The Android system also poses some problems that may interfere with network access.
Problems with Android files
System files of drivers and libraries responsible for the “modem firmware” (the operation of the gadget’s cellular radio modules) can be deleted by the user in the following cases:
- careless actions with the Root procedure (“crooked” Root application);
- hasty actions with third-party file managers;
- Inadequate user experience with files in the /system/ folder.
The result is unpredictable behavior of the tablet in seemingly normal conditions. Thus, it is possible that even when manually searching for networks, not all networks are displayed (or none), although their coverage is declared by operators and confirmed by other smartphones and tablets - not necessarily with Android - at the same point on the map where you are.
Android viruses and unverified programs
It is possible to install applications that have not been verified by Google Play and have introduced a malicious extension (virus, spammer, SMS sender to short numbers, etc.). During a virus attack on Android, system processes and services vital for Android operation crash.
 When the “Allow installation of applications from unknown sources” option is active, there is a high probability of picking up a virus from an unprotected site
 Android device compatibility errors
The “custom” version of Android works, but the built-in cellular modem is unstable or refuses to start (incompatible modem firmware). If a different version of the Android kernel or firmware is installed, the device will not only not connect to the Internet, but will not start at all. You may need assistance from a service center.
Causes of network problems on the operator’s side
A cellular provider, like any data network, can also throw any of the “surprises” to its subscribers:
- there is no 3G/4G coverage in a given area (for example, a mountain range, regions of the Far North);
- the 3G/4G network is overloaded (abundance of subscribers, peak activity, operator ahead of the unlimited traffic market);
- frequent auto-restart of the base station due to overload and freezes (protection of modern BS from traffic overload);
- problems with the “transport” network - the optical cable of the BS or the highway is damaged due to careless work near it;
- repeated restart, forced testing (“run”) of the network at your site;
- a sharp decrease in the 3G/4G signal level due to a power outage;
- burnout of terminal blocks of the BS as a result of lightning strikes during bad weather in the “tower” (rare, but possible, even with existing protection from thunderstorms);
- frequent reboots, decrease in BS speed due to interference created by thunderstorms;
- modernization at the base station or part of the transport network: replacement of equipment and other planned work carried out by specialists of the operator company.
Specific cases of Internet inoperability on Android
There are more than enough more specific reasons for the Internet not working on Android devices. The most common ones are taken as an example.
Data transfer does not start
Although the Android operating system monitors the activity of SIM cards and regularly “registers” all functions from them - calls, SMS and MMS, Internet settings - in its main settings, there may be cases when data transfer is not enabled. The reasons may be the following:
- you have assigned the wrong SIM card (if there are two or more of them in the device), on which everything is ready to access the Internet;
- the presence of only one of the SIM cards in the device;
- crash or error in the Android version;
- broken SIM card slot when it was removed carelessly (now the selected SIM card is not active);
- your mobile device is “locked” to one operator - SIM cards from other operators refuse to work with mobile data.
Do the following (optional, depending on the situation):

Video: data transfer on Android does not turn on
Cellular data turns on but doesn't work
If the Internet settings turn on, but do not work, again, the reason may lie both on the operator’s side (network problems or overload on your network section) and on the subscriber’s side (unlimited unlimited payment was not paid on time, etc.).
In this case, the data transmission indication - markers G, E, 3G, (D/M)H(+), 4G(+)/LTE at the top - is present, but there is no traffic. Outgoing requests go away, but incoming data does not arrive, there is no response from the called server. When entering any website, the browser reports that it is impossible to open the site, and social network clients and other programs write: there is no Internet. Cellular data often fails due to a very weak signal. Change your location.
The G/E/H/3G markers in the Android notification line often change
If the G/E/H/3G markers change frequently, this is normal. First you need to figure out what it is.
The 3G symbol is the 3G data transmission medium in the gadget's rest mode (data not in use). The 3G marker is the WCDMA/UMTS network as such: the available low-level speed with which the third generation of mobile communications began - 384 kbit/s (for reception and transmission separately).
H (HSPA), H+ (HSPA+), DH+ (DC-HSPA+), MH+ (MC-HSPA+) are stages in the development of high-speed data exchange based on 3G/UMTS. These are multi-megabit technologies (3.6–336 Mbit/s, depending on the equipment of 3G base stations), which ensure comfortable work on the Internet via mobile data.
G (GPRS) and E (EDGE) are stages of implementation and development of packet data transmission in legacy GSM/2G cellular networks. GPRS supports speeds up to 115.2 kbit/s, and EDGE - up to 236.8 kbit/s per device.
 The marker in the upper right corner of the notification bar shows the type of Internet connection
 In 4G networks, the “4G” marker can change to “4G+” (LTE-Advanced). It is possible to replace LTE with LTE-A (or LTE+) - on the latest models of smartphones and tablets and in the web interface of modems and routers. We are talking about speeds of 75–10 and 150–300 Mbit/s, respectively.
Now we can answer the question why these letters change. Whenever a subscriber engages in data transmission, the base station provides him with the maximum possible technology speed that it supports - despite fluctuations in the actual (resulting) speed. So, if your 3G has changed to H+, consider this a good sign: your mobile Internet is “flying”!
Video: how to make H+ constant, without E
How to prevent problems in the future
- To prevent similar problems in the future, carefully check the status of your tariff for unnecessary subscriptions and services, sometimes imposed by the operator, from time to time - do not allow unscheduled debiting of funds and blocking of the number. Pay for your unlimited payment on time.
- From time to time, look at the 3G/4G coverage map of the places you travel to frequently. In case of discrepancies, please contact your operator. It's a good sign if network coverage has improved somewhere. It is also useful to monitor the progress of his work on the quality of the Internet and its networks, but not necessary.
- Be careful when working on Android system files and folders. Don't use apps from dubious sources. Do not install applications that block or restrict data transfer. In case of errors, reset or reflash the gadget.
- Do not “poke” SIM cards for every slightest reason - after several hundred rearrangements, the SIM card may break, because it is a very fragile element. SIM replacement is most often done when more “tasty” conditions appear with another operator (another discount, promotion, new tariff).
In the modern world, cellular Internet is provided automatically by the operator. If the Internet was not automatically configured when installing a new SIM card, in any case, there are many ways to enable it - manually entering APN addresses, setting up through “Mobile Data”, and so on. You can disable the Internet either through the same “Settings” or through airplane mode or parental controls.
You have a smartphone that supports 4G - the fourth generation of mobile communications, which allows data transfer at very high speeds. The 4G network allows you to watch videos online in high quality or quickly download files. In this article we will tell you how to enable the 4G network. The smartphone used in our example is a Samsung Galaxy.
Since the 4G network is most often turned on by default, the only thing you need to do is turn on the mobile Internet. This is done simply: first you need to open the notification panel, for which you swipe your finger across the screen from the top of the screen to the bottom.

Here you will see icons, including the icon for turning on/off mobile Internet. It may look different, and even have an inscription somewhere. In our example it looks like this:

Tap on it, the icon changes color, the Internet is turned on.

One of the signs that a 4G network is currently being used will be the icon of the same name in the status bar:

However, remember that in some cases the icon may not appear at all.
If the 4G network is still disabled, go to Settings.

Open "Connections".


Click on "Network Mode".

Select LTE/3G/2G mode. In some cases it is simply called 4G or LTE.

It's not uncommon to hear about someone finding a phone on the street. Such cases are quite common. But what to do when you find an iPhone and how to unlock it? It is known that Apple products (iPhone, iPad, Mac) are distinguished by their reliable security system. Unlocking someone else's iPhone is not that easy. We will look at possible options for unlocking a found iPhone.
Is it possible to reflash a locked iPhone with the Find My iPhone function?
The difficulty of hacking an iPhone lies in the different levels of security system. An iCloud account, Face ID, fingerprint, digital code - that's all that reliably protects Apple devices. If the Find My iPhone function is enabled on your iPhone, it will be impossible to reflash the device.
If you found an iPhone and decided not to return it to the owner or cannot find it and want to use the smartphone, then the only option to unlock it is if the “find iPhone” function is disabled.

To disable “Find My iPhone” you will need an Apple ID and an iCloud password. You can contact technical support to confirm that the phone is yours, but this will require documents about the purchase of the device.
Advice: if the owner of the gadget noted using “find iPhone” that his phone was stolen, try to find this person as quickly as possible and return the iPhone.
If the owner cannot be found, try selling the smartphone for parts, indicating the reason for the sale. Perhaps someone will buy a phone in a locked state.
DoulCi to unlock someone else's iPhone
In the world of modern technology, there is no such thing as the impossible. Hackers are constantly trying to hack what developers of various equipment so carefully protect. DoulCi is a tool for hacking locked iPhones. This method appeared after the release of the iOS 7 update.

To use the DoulCi hack tool, you need to do the following:
- Download the package with the program
- Run DoulCi HostSetup to create a virtual server on your computer
- Disconnecting from Wi-Fi
- Disabling the antivirus
- Open doulCi iCloud Unlocker
- Connect iPhone to computer via USB cable
- We authorize the device by creating a host file that will act on behalf of the Apple server.

Thus, we log into a new iPhone account that we ourselves create from scratch.
Important: the latest versions of iOS are resistant to doulCi, so they will not allow an unauthorized user into your account.
Please note that in addition to iCloud blocking, there is also an IMEI blocking. Even if you were able to connect to the device via doulCi, but the IMEI lock is active on the phone, you will not be able to log in.
Bypass blocking via DNS
With the release of the iOS 8 update by Apple, the doulCi hacking method became ineffective. But instead, a new way to bypass iCloud account blocking has appeared. This can be done by changing the DNS address. To do this you need:
- Go to Settings
- WiFi
- Click on the “i” icon next to the Wi-Fi network name
- In the DNS column enter “78.109.17.60”.

It may not work out the first time, so you should try several times. To do this, the phone must be reset to factory settings. It is also worth pointing out that this method of bypassing the blocking is partial. Connecting to an external server allows you to watch videos, play games, listen to music, change settings, but limits access to phone calls and SMS messages.
Unlocking via iTunes
One option to reset all iPhone settings to factory settings and log in without a password is to use iTunes. To start the recovery you need to complete several steps:
- Install the latest version of iTunes on your computer
- Connect the device to the computer via a USB cable
- Press and hold the “Home” + “On/Off” buttons
- Hold for up to 5 seconds and release
- Enter the Device Firmware Update mode
- Click the “Restore” button
- We are waiting for the process to finish.

After downloading the updates, the iPhone will boot without a password. However, if the owner installed an iCloud account and made backup copies, then he will not be able to fully use the gadget.
Contacting specialized services
A specialized service can help you unlock Apple products, but with several conditions. The client must provide documents confirming the purchase of the device and attach a receipt to them. The package of documents must indicate the address and contact number of the seller.

Otherwise, you can use the help of specialists to find out the contacts of the owner of the phone and return it for a reward. You should not contact third-party iPhone unlocking services that charge money for it. These are nothing more than scammers.
Conclusion
The Apple technology security system has proven itself to be the best. This suggests that the found iPhone should not be kept in your hands. It’s easier to return the device to the owner and, perhaps, receive financial gratitude for it.

If all attempts to unlock the found iPhone failed, and you could not find the owner of the phone, try selling it for spare parts to repair services.
The main task of operators is to attract new subscribers and retain old ones. This explains that MTS is trying to develop more profitable tariff plans and other services. At the moment, the operator offers its customers to use high-speed 4G Internet. But how to connect 4g to MTS?
Initially, you must select a suitable tariff from the main line of offers. You must have a special SIM card that supports LTE MTS. Buy it at a communication store. Let's look at the details of the settings and analyze the nuances.
The first step is to go to the official MTS website and familiarize yourself with the 4G coverage area. Find your locality and make sure this technology works in your region. This does not apply to large cities. The operator is constantly expanding coverage and improving development.
How to connect 4g Internet to MTS? You must purchase a SIM card that supports LTE technology. Basically, high-speed Internet starts working immediately, without requiring additional steps. But sometimes you need to change some parameters for comfortable work.
Setup can be done via USSD code. Dial on your phone keypad – *424#. Or send an SMS to number 111 with the content – 333. As a return message you will receive settings that will change the necessary parameters automatically. If problems arise, you will have to change the settings yourself.
APN Settings
APN is the name of the access point. Required to identify packet data transmission. In other words, this is necessary to access the Internet, so this item needs to be configured correctly. How to do it?
- Go to your phone settings.
- Find the tab where the connection parameters are located.
- Then enter MTS Internet in the name.
- Enter – internet.mts.ru as an access point.
- In the next field write – mts.
This is just a standard and general description. It is worth considering in detail the issue of connecting to the LTE network on different telephone platforms.
If you use Windows Phone, then you need to do the following:
- Go to settings.
- Go to the “Data transfer” column.
- Click on the add access point button.
- Enter APN – internet.mts.ru.
- As login – mts
- Save the changes and reboot the gadget.
On Android, the presented item is located in the “Access Points (APN)” tab.
How to set up 4G on Android

How to set up 4g MTS on Android:
- In settings, click "More".
- The phone will show you additional options. Select Mobile.
- From the suggested items, click on “Network Type”.
- Check the first box.
Don't connect to 4G only. Otherwise they won’t be able to reach you. It is recommended to select the automatic mode – 4G\3G\2G.
How to connect 4G on iPhone
To use the presented technology on iPhone, you need to do the following:
- In settings, find the “Cellular” tab.
- Go to Data Options.
- "Voice and Data".
- From the proposed options, check the box for LTE.
The tablet is configured in the same way. The exception is the modem. Connect it to USB, wait for the driver to install and click on the connect button on the screen. Mostly standard modems do not include settings. Users will have to enter them themselves.
4G, by which we mean LTE technology, is the fastest today. Why are we talking about LTE? Because true 4G is not yet available on mobile devices, but LTE is the first step towards ensuring that in the future we will be able to enjoy connections with speeds of up to 1 Gbps.
LTE and 4G are very fast wireless Internet. Nowadays it is available from almost all operators
Be that as it may, high-speed LTE is already available in Russia from many operators and is supported by a fairly large number of smartphones. Let's find out 4G on Android depending on your operator.
How to connect 4G on Android?
Before you start using high-speed Internet access, you should activate the appropriate tariff plan from your operator. After which the profile settings for connecting to the network should come to you automatically via SMS message.
If you have received it, then you only need to save these settings on your smartphone and check if this profile is selected as the one used on the device.
If for some reason you did not receive the settings and they were not activated automatically, you can install LTE manually.

Installing 4G and LTE on Android
Regardless of the operator or manufacturer of your gadget, it always looks almost the same. Therefore, to connect to high-speed Internet you need to do the following:
- Open the main menu and select settings.
- Click on "More" or "Other networks".
- Select Mobile Networks.
- In the window that appears, check the “Mobile data” line, then select “Access points”.
- Select the pop-up (context) menu and click New Access Point.
How to set up 4G Internet? You will need to fill out a profile for . What matters here is what operator you have, so select the necessary information from the data below.
You need to enter the following values:
- Name: Beeline, MTS, Megafon or Tele2 Internet, depending on which operator you use.
- Access Point (APN):
- MTS - internet.mts.ru.
- Beeline - internet.beeline.ru.
- Megafon - internet
- Tele2 - m.teleru
- Username:
- MTS - mts
- Beeline - beeline
- Megafon - gdata
- Tele2 - leave field blank
- Password:
- MTS - mts
- Beeline - beeline
- Megafon - gdata
- Tele2 - leave the field blank
- Authentication type: PAP for all operators.
- Access point type: default for all operators.
Additionally, for Tele2 the proxy server should be left disabled.
Once completed, save the profile and make sure it is selected and activated. It may be worth rebooting your device for the system changes to take effect. After this, you should have 4G LTE Internet.
What if you can't activate 4G?
It happens that you are absolutely sure that your smartphone supports this technology, but there is simply no network selection in the settings as such. Don’t be upset - the culprit of this problem is considered to be the Android firmware, which does not provide the 4G Internet function from Tele2 and any other operator.
There is a special application that can find and activate 4G/LTE on your device - ShowServiceMode. It is definitely suitable for gadgets whose description clearly states the presence of the LTE function.
Note that the price of the utility is only a few dollars, which are worth it - thanks to them you can enjoy unprecedentedly high Internet speeds. Moreover, why not use such a useful function if you paid money for its presence when purchasing a gadget?
So install the program, run it and do the following:
- In the window that appears, select the “Run with above settings chosen” button.
- Afterwards a black screen with four lines will appear - we are interested in “LTE Band Preferences”, so select it.
- Then there will be only one line - “Band Pref: LTE ALL”, which also needs to be clicked.

That's all - after this, the smartphone miraculously begins to work with LTE from Tele2 and other communication providers.
As you can see, connecting to the new generation Internet is not so difficult - you will need a minimum of actions and time investment. The main thing is that there is a tower with LTE near you, and you will be able to enjoy fast access to the network and your favorite applications running over the Internet. Note that the speed of such a connection is indeed higher than with the 3G standard, so it is worth the money.