The computer sees Wi-Fi connecting. The laptop does not connect to the mobile hotspot. Why doesn't my laptop connect to Wi-Fi? Why doesn't my laptop connect to the wireless network?
Problems with the Internet are always unpleasant. They can interfere with work or entertainment, or limit other online experiences. If we are talking about a cable connection, there may not be many possible causes for this problem.
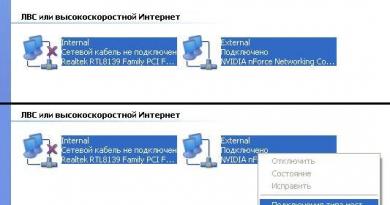
The laptop detects an available Wi-Fi network, but does not connect
One fairly common network problem is when your computer sees a network available to connect to, but for one reason or another is unable to connect to it. This problem may occur for one of the following reasons:
- a problem with the hardware drivers on the laptop - for this reason, the connection may not work or may be interrupted immediately after a successful connection to the network;
- communication interference - there should not be too many devices connected to Wi-Fi, and you should also make sure that nothing can create interference between your laptop and the router;
- the password for connecting to this network was entered incorrectly - if you entered the security key incorrectly, the connection will not be completed;
- network mismatch - if the connection settings on your computer and the network settings do not match, the connection will not be completed;
- failure of the operating system - if there are some problems with the operating system, the connection will not be made correctly.
Solutions to problems with connecting to a wi-fi network
Let's look at the solution to each of the problems mentioned above one by one, and also study general recommendations for those who have encountered this problem in their system.
Error “Windows could not connect to Wi-Fi” and how to solve it
When you try to connect, you may see the message “Windows was unable to connect to the Wi-Fi network.” This error can have several causes. You can determine the source of the problem as follows:
Video: fixing internet connection problems
Security key mismatch when connecting to a Wi-Fi network
A security key is a security code for your Wi-Fi network. The user sets it independently so that strangers cannot connect to the network. And if you encounter an error about entering the wrong password, then it is likely that it was indeed entered incorrectly. Do the following to be sure to correct the situation:
- Do not enter characters blindly - when you enter characters, they are automatically replaced with hidden characters. Uncheck "Hide Characters" to display normal text. This way, before sending, you can make sure that the password is entered correctly;
Check the “Display characters entered” checkbox to ensure you entered the correct password
- check the input layout - with hidden characters, you might not have noticed that you entered the password in the wrong language. Change the language and try entering the password again;
On Windows 10, you can change the language using the Win+Space key combination.
- Make sure that the Caps Lock key does not enable you to enter in capital characters - the security key is case sensitive. Therefore, it is important when entering to pay attention to the Caps Lock key, which locks the input in capital letters;
Pressing the Caps Lock key changes the case of the characters you type
- check your password - if your password is written down somewhere, then you should check these records. Human memory can sometimes fail. And also to compare your information, you can ask for help from another person who knows the password.
You should not tell your security key to strangers - this will lead to additional connections, which in turn will slow down your Internet speed.
Inconsistency between saved network parameters
After creating a new connection, you may often see an error with the text “The network settings saved on this computer do not meet the requirements of this network.” This problem often occurs after setting up the router yourself. To fix this situation, all you have to do is delete the connection and then create it again. This will update all settings and establish a connection again. This is done as follows:
- Click on the Internet icon in the lower right corner using the right mouse button and select the “Network and Sharing Center” section.
Select "Network and Sharing Center" from the context menu of network connections
- After this, you need to open the management menu for wireless networks. This is done using the corresponding button on the left side of the screen.
Go to the "Wireless Network Management" section
- Call the context menu for the network that is generating the error and select “Delete network”.
Right-click on the connection and click “Delete Network”
- And then try to connect to the network again. Now that there is no data stored about this network, the connection should work fine unless the network is password protected.
In Windows 10, this problem is solved a little differently:

The problem may arise, for example, due to a careless change in the data in the connection settings.
Other ways that can help you connect
And now let's look at a few general solutions that can help you with various connection problems. In our case, when it is impossible to connect via Wi-Fi, these methods will also help.
Reboot the router
The simplest method, which is recommended by all providers first of all. Of course, this will not help with serious problems, but it can eliminate one-time connection problems. The best way to reboot is as follows:

Checking and installing network drivers
Updating network drivers is no more difficult than updating drivers for any other equipment. You can do this using the automatic driver download system as follows:
- Press the Win+X key combination to open the quick access menu and select the “Device Manager” section there. Another way to get to this menu is to right-click on the Start icon.
Select the "Device Manager" section from the quick access menu
- In Device Manager, find the Network Adapters section. Expand this tab and you will see your network devices. And then right-click on the available equipment. After the context menu opens, select the “Update drivers...” action. In order to determine whether a device needs to update its drivers, pay attention to its name and the presence or absence of an icon indicating the need to update drivers.
Open the "Network adapters" section and click "Update drivers" on the desired device
- You will be asked for an update method. If you have an Internet connection (for example, using a cable, since a Wi-Fi connection is not available), then just click on the “Automatically search for updated drivers” button.
Select "Automatically search for updated drivers" if you have a network connection
- Wait until the search, download and installation of drivers is complete.
Wait for the drivers to be searched on the network and installed.
- If there is no network access, you must download the driver for your network adapter from another device and select “Browse for drivers on this computer.”
To search for drivers yourself, select “Search for drivers on this computer”
- Specify the location of the folder with drivers for further installation.
Specify the location of the drivers on your computer and click on the “Next” button
- After the installation is completed in one way or another, restart your computer.
- Try connecting to the Wi-Fi network again to see if your problem is resolved.
If a simple update does not help, try completely uninstalling the driver and installing it again using the same method.
Resetting the router
If problems with the Internet do not go away and you still cannot connect to Wi-Fi, you should resort to a more radical way to fix this problem. Namely, reset the router settings and configure it from scratch. You should not do this if you are unsure of your own knowledge and attentiveness - you risk being left without access to the Internet. You can reset the router in the following way:
- Open any browser and enter the numbers of your local address into its address bar. Try the numbers: 192.168.1.1; 192.168.0.1; 192.168.0.254. One of these addresses will be correct.
Enter the local address of your computer in the browser to open the router settings
- To log into your account, enter the word admin as both your password and login.
Use the word admin as your login and password
- Go to the Factory Defaults section and click on the Restore button to completely reset your router.
Click on the Restore button to completely reset the router settings
- Another way to reset the settings is to find the RESET button on the back of the device and press it for a few seconds.
Press the reset key for a few seconds to reset
After performing the reset, the device will return to factory settings. Most likely, you will not have to configure anything manually after this and your Internet problems will already be resolved. But in case you still have to make the settings yourself, this is done as follows:
- Enter the settings of your router in the manner indicated in the previous instructions.
- Go to the network section using the left panel of the router settings.
Almost every day visitors to our service center ask the question: Why does a laptop or PC see a Wi-Fi network in the list of available ones, but does not connect to the router (access point). Today we will tell you why this can happen and how to solve this problem. After all, a laptop without the Internet is a useless thing. What to do with it then? It's not like playing chess. So, let's go.
Why can't my computer connect to the Wi-Fi network? After all, he sees her!
Reason #0 - the user enters the wrong security key (i.e. Wi-Fi password). Therefore, first, make sure that you are entering a valid password. It is best to set a key of 10 digits and you will definitely not confuse the language layout.
1. Weak Wi-Fi signal
Most often the problem is that Your laptop's Wi-Fi transmitter does not have enough power in order for the signal to reach the router antenna. But at the same time, the wireless receiver catches the router’s network because The router often has a more powerful radio transmitter.
In other words, we can say this: the client device “sees” the router’s signal, but the router does not “see” the client’s weaker signal. Therefore, at first glance, it turns out to be an absurd situation when the laptop sees the network, but does not connect to it.
Solution: This is not a malfunction. The solution is to reduce the distance between the client and the router. In large houses, it is recommended to place routers and access points in the middle of the territory or use them to connect to the Internet.
If you are sure that this is not your case, read on.
2. The MAC address filter is enabled in the router settings
If this Wi-Fi network belongs to you, or an access point, add the MAC address of the device (which finds the Wi-Fi network but does not connect) to the allowed list:

If the network and router are not yours, ask your administrator to set up Wi-Fi and Internet access for your computer or laptop, if possible.
3. The router is set to 802.11 mode, which the client device does not support
If you have set the standard in the Wi-Fi network settings of your router 802.11n only, then only those laptops that support the N standard will be able to connect to the wireless network. Most often, these are new smartphones, laptops and tablets. In order for older devices to also be able to connect to the router and access the Internet, set the mode in the settings 11bgn mixed(mixed):

4. Wi-Fi adapter driver does not work correctly
This case is not very common, but still occurs. The last time I encountered something like this was on a friend’s Asus laptop. It was like this: the laptop officially supported only Windows 8.1, but in the store the person was sold and installed a licensed Windows 10. When the manager went to the manufacturer’s official website and realized that there were no drivers for Windows 10, he manually installed a Wi-Fi driver from Windows 8. This is where the problem we are talking about today appeared - the laptop detects all the Wi-Fi networks around, but connects every once in a while and the connection constantly drops.
In this situation, the only correct solution to the problem is to install a compatible driver. Go to the official website of the laptop manufacturer and download the latest version. If there are no drivers for a given OS, you need to install the version of Windows that is recommended for use on this PC. In my case, I had to install Windows 8.1 and only then did Wi-Fi work normally and the Internet connection stopped dropping.
This question applies not only to laptops, it is quite suitable for a regular personal computer. So keep this in mind.
So why won't my laptop connect to Wi-Fi? What could the user do wrong when working with the network, did he install the drivers for the router correctly, and did he turn it on at all? There can be many reasons why the network is not visible to the computer, so I will try to talk about the most popular ones.
Connecting to a wireless network step by step
So, let's look at what the user might have missed when connecting to the network. To do this, we'll look step by step at what you need to do to connect to Wi-Fi.
- Press the button on the laptop that turns on the Wi-Fi adapter. It usually either says wi-fi or has an antenna icon.
- It is possible that the adapter is disabled through Network Sharing Center or in Device Manager, enable it there.
- Connect to an available network.
If we talk about the first option, then, as you understand, everything is easy here, you just need to press a special button to turn on wi-fi. This is usually done with a keyboard shortcut Fn+network button.
The second option could be this. Some laptops have a special button that also turns on wi-fi, if you find one, use it. Well, go to the Network Sharing Center and Task Manager, make sure that everything is turned on there too.

What to do if the laptop does not want to see the network?
If you tried to turn on wi-fi, but it did not give a positive result and the network is still not found, then most likely you should check the router itself.
After all, it is he who is the access point and the cause of all problems may be precisely in him. The simplest thing to do is restart it, this usually helps, also restart the computer. Check the wires to see if everything is connected and is not coming loose anywhere.
If the above method did not help, then the reasons may be a little more serious.
- The computer has crashed or is damaged;
- Connection errors;
- The router has a malfunction or is completely broken;
- The network is not turned on.
The first option is to check the drivers
A driver is a set of programs that controls our equipment; if something is “broken” in this complex, then in our case, it is unlikely to connect to the network, therefore, we need to check the status of the drivers.
We can view the drivers in our favorite device manager. In Window 7 and 8, you can access it through the Control Panel; in Windows 10, right-click on the Start menu and select "Device Manager".

In the device manager window that opens we find the tab "Network adapters", open it. If there is no such tab, then the problem is still in the drivers. Also, if the network equipment is indicated there with a yellow exclamation mark, then there are no drivers.

In this case, you can download drivers on the Internet from the manufacturer’s website, for example, or.
If you have a disk with drivers, this greatly simplifies the task; you don’t have to look for anything.
The second option is to check the connection status
If you have figured out the drivers or are sure that they have nothing to do with it, then let’s try to check the status of the network itself, for this we will go to the network control center. In Windows 7 you can access it through the Control Panel, and in Windows 10 you can right-click on the wi-fi network, which is located on the taskbar, where you can select the time "Network and Sharing Center".

As soon as you go there, look for the button on the left "Change adapter settings", click on it.

In the next window you will see all the networks you have. We are interested in "Wireless network". You can try turning it off and then turning it on.

In our case, it is clear that the network is working, if there was a red cross there, then the network would not exist; if the icon was gray, it means that it is disabled.
The third option is network diagnostics
This option does not always help, I don’t even know why this network diagnostic is needed, but it can show what the problem is. To check the network, we also go to the control center, adapter settings, right-click on our network and select "Diagnostics". The same can be done if you click on Wi-Fi network on the taskbar near the clock.

If the check shows that something is wrong, then try following the instructions, for example, connecting the adapter, restarting, and much more. Usually diagnostics tries to solve the problem on its own.
Option four – faulty router or network card
This is the saddest option, if the router breaks down or the network card burns out, then the router will have to either be changed or sent for repair, the same with the network adapter.Only you know why the network card burned out or the router broke down. This may be due to electricity or careless handling of equipment. We'll have to repair it and pay back the money.
I think that the most common mistake may be that the user is too far from the access point; due to a very weak signal, the network will not work, but this option, although it looks childish, also has a place to be.
I described possible problems with the network and a little about how to solve them, I think that you can install the drivers yourself and turn on the “Wi-Fi” button, so I did not describe all this in so much detail. If you have ideas about why the computer does not connect to the Wi-Fi network, be sure to write about it in the comments, everyone will be very interested to know about it. And don't forget to ask questions.
Video “How to connect and configure Wi-Fi on a Windows 7 laptop”
In this article we will look at a situation that many users face. You click on the wireless networks icon in the lower right corner of the desktop, select the desired network from the list, click Connect, but instead of accessing the Internet, an error appears: “Windows could not connect to...”.
There may be several reasons why this window may appear. We will look at some of them in this article, and we will figure out why Wi-Fi may not connect to a laptop.
Network diagnostics
Let's start with the settings in the operating system.
We will perform network diagnostics. Click on the wireless network icon in the tray, select the one you need and click “Connect”. Enter the password if it is protected.

When an error window appears, click on the button in it "Troubleshooting". Windows will search for problems and offer solutions. Just follow the recommendations. In some cases, this helps, and the laptop successfully connects to Wi-Fi.
If the diagnostics displays the message: , read in a separate article how you can solve the problem.

New network connection
If the laptop still does not connect to Wi-Fi, then we will delete the network we want to connect to and connect again. This may help if you or someone else has recently... The laptop has other settings saved that do not match the current ones, which is why it does not connect to Wi-Fi. By the way, for the same reason it occurs.
Right-click on the network icon and select "Network and Sharing Center".


In the list, select the network to which the laptop cannot connect, right-click on it and select “Delete network”.
You can read about how to forget the network on Windows 10 in the article:.

After that, click on the network icon in the tray again and connect to the desired Wi-Fi network. You may need to find out and enter your current password. After this, Internet access should appear.

Changing router settings
Let's move on to the router settings. They could have gone astray for some reason, or someone replaced them. Since you do not have access to the network on your laptop, open your favorite browser on a computer that is connected to the same router via cable and enter the IP address in the address bar: 192.168.1.1 or 192.168.0.1.
Data cleaning
route -f
ipconfig /flushdns
netsh int ip reset
netsh int ipv4 reset
netsh int tcp reset
netsh winsock reset
After each, press "Enter". This will help clear data in DNS and Winsock, reset routes and network adapter parameters.
That's all. I hope at least one of the described methods helped you. And now you will know what to do if the laptop sees the Wi-Fi network, but cannot connect to it, as a result of which an error window appears.
Rate this article: (2
ratings, average: 5,00
out of 5)
Webmaster. Higher education with a degree in Information Security. Author of most articles and computer literacy lessons
Today we will look at:
Very often we encounter such a problem as lack of access to Wi-Fi. This problem mainly occurs in Windows operating system. What is the reason, and what will be the solution to the problem? This is what we will now try to find out.
So, there are several reasons why a laptop cannot connect to Wi-Fi. Problems with the settings of the laptop itself, outdated drivers. Let's take a closer look at these reasons and find ways to fix the problem.
No wireless adapter connected
The problem is that there is no connected wireless adapter on the laptop itself. In each laptop model, manufacturers install a button to turn the Wi-Fi adapter on or off on the F keys. Look at your keyboard and look for the Wi-Fi symbol, usually located at F5, F10 or F12.
Next, we find the Fn function button and simultaneously press Fn and F12 several times (you press the key where the Wi-Fi icon is drawn), see what happens, whether there are any changes. Sometimes it happens that Fn is not active because there are no drivers installed; if when you press F12 and Fn the laptop does not react at all, then check the Fn key by turning up or down the volume.
In addition to the adapter, you need to check in the network connection settings whether the network card is connected.


Did not help? So, we do the following:


Drivers not installed
This problem mainly occurs when Windows is suspended on a laptop.
If a non-professional installed the system, he might not have installed it, which led to Wi-Fi being turned off.
To check this, you need to do a few simple manipulations:
Using Win+R, go to the “Run” window, give the command devmgmt.msc, and select the name of your router from the list. If there are no drivers, then instead of the router name the standard “Ethernet controller” will be indicated.

So, in the list, instead of the name of the router, we found “Ethernet controller”. There are two ways to solve the problem:


True, for this you also need to download the driver from the official website, but you do not need to install it. In Device Manager, right-click on the name of the adapter and then select the “Update drivers” command. Then restart the laptop and check if Wi-Fi is connected.
Troubleshoot connection problems

Click on “Properties”, a list appears in the newly opened window, in which we find the item: IP version 4 (TCP/IPv4), double-click on it with LMB, the window with DNS settings and IP address parameters opens again.

Here, be sure to check the box next to “Use the following IP address.” We specify the parameters exactly as in the example, click OK, and check.
Disabled WLAN services
If all of the above methods do not help, the last thing you can do is check the WLAN auto-configuration service. Of course, shutdowns happen extremely rarely, but everything happens at some point, and checking it won’t hurt. So, press the combination Win+R that is already familiar to us, enter the command services.msc and click OK.

In the window that appears, we find: “WLAN AutoConfig Services”, right-click on it, and in the drop-down window, execute the “Run” command.